Publication
This is a completely different view of the EA repository - publishing selected diagrams in an arbitrarily defined structure. By using this feature, business users can be shielded from the often convoluted model structure in EA and view models in a structure that is close to their own. This structure can be arbitrarily defined by department, project, customer or otherwise.
- Sections
- Publication Module Structure
- Move the section
- Creating a Section
- Edit a Section
- Delete a Section
- Publication statuses
- Publishing a Diagram
- Approval of Publications
- Historisation of Published Diagrams
- Logging Changes in a Publication
- Historical Publication
- Setting default section rights
- Rights in the publishing module
- Setting user and group permissions
Sections
The basic building block of the publication are the so-called "Sections", which correspond to different departments in the company structure and into which the diagrams are published.

Publication Module Structure
The use of the publishing module is suitable, for example, for process books, company IS architecture, organizational structure publishing - wherever there is a need to publish information in a different structure than in the EA repository.
The publication module consists of so-called sections and has a hierarchical structure - its root is Publication.
Diagrams can be included (published) in a section. The publishing of diagrams is governed by a workflow, see below
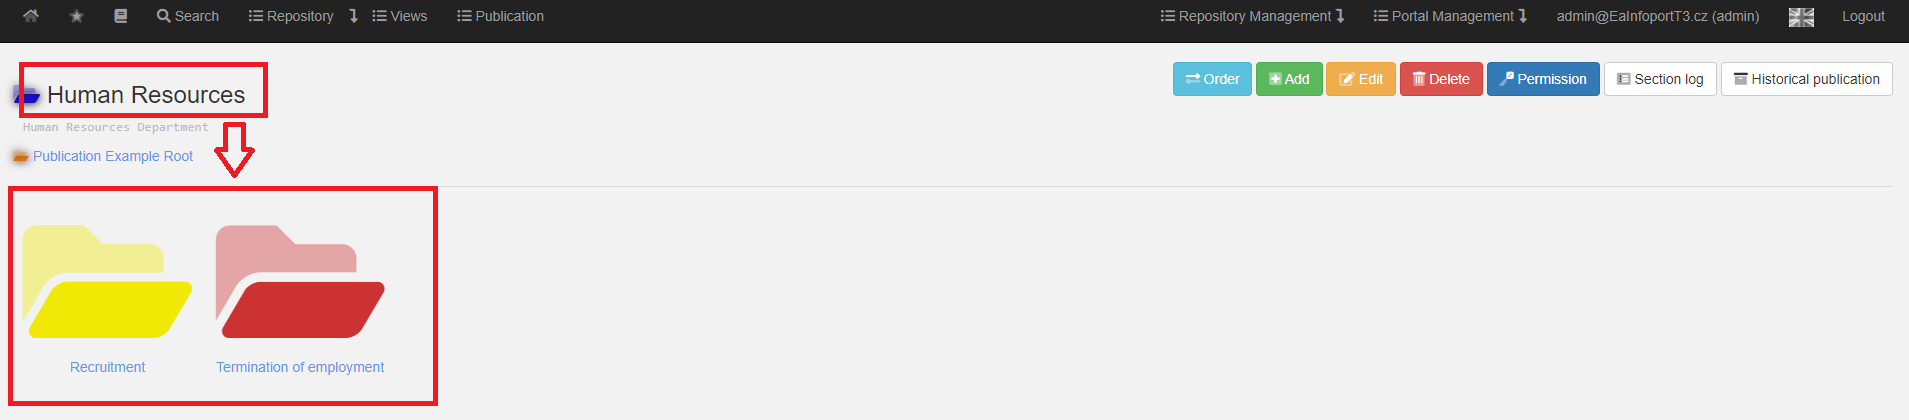
A section can be divided into further subsections.
Each section can have a color, a name, a description and other details (see below).
Each section has a title, description, date and time of creation, as well as a configurable color.
Move the section
The user can change the order of each section.
To change the order, the user clicks on the "Order" button.
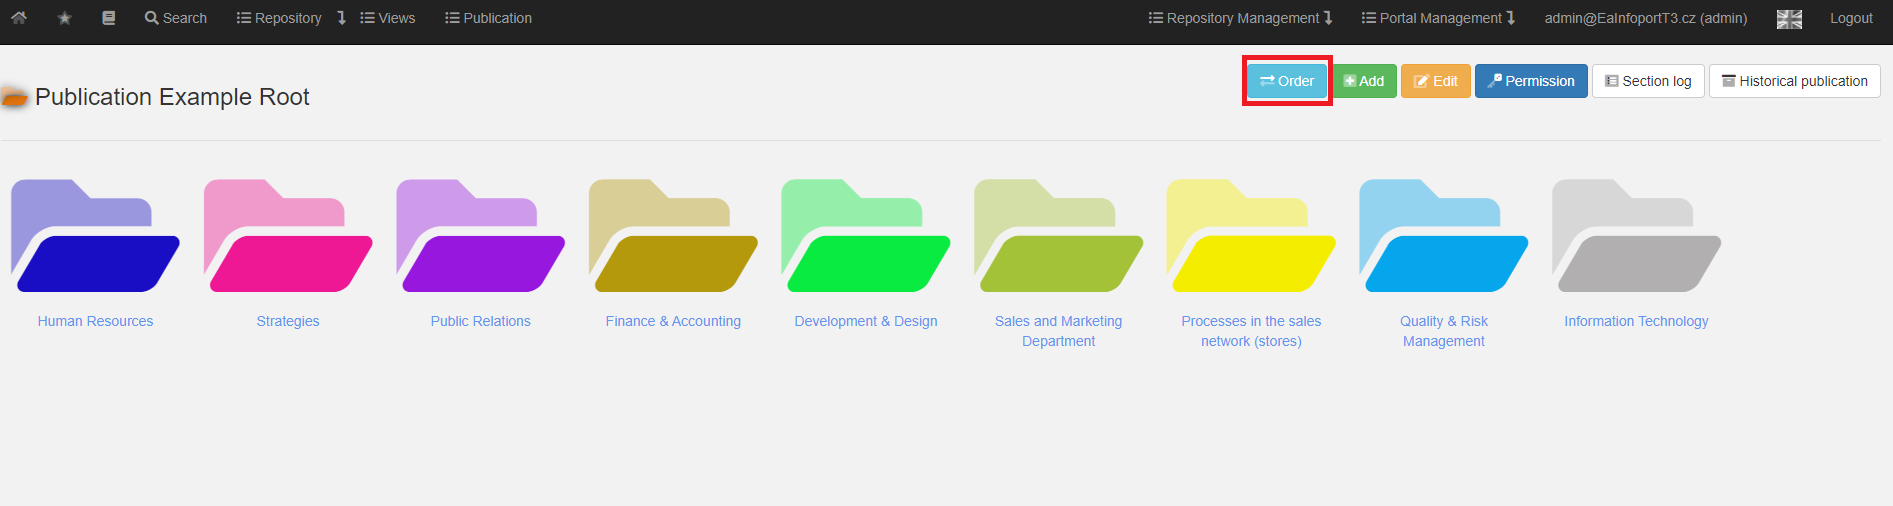
The user will see arrows next to each section.

Clicking on the arrow will move that section one section to the left or right.

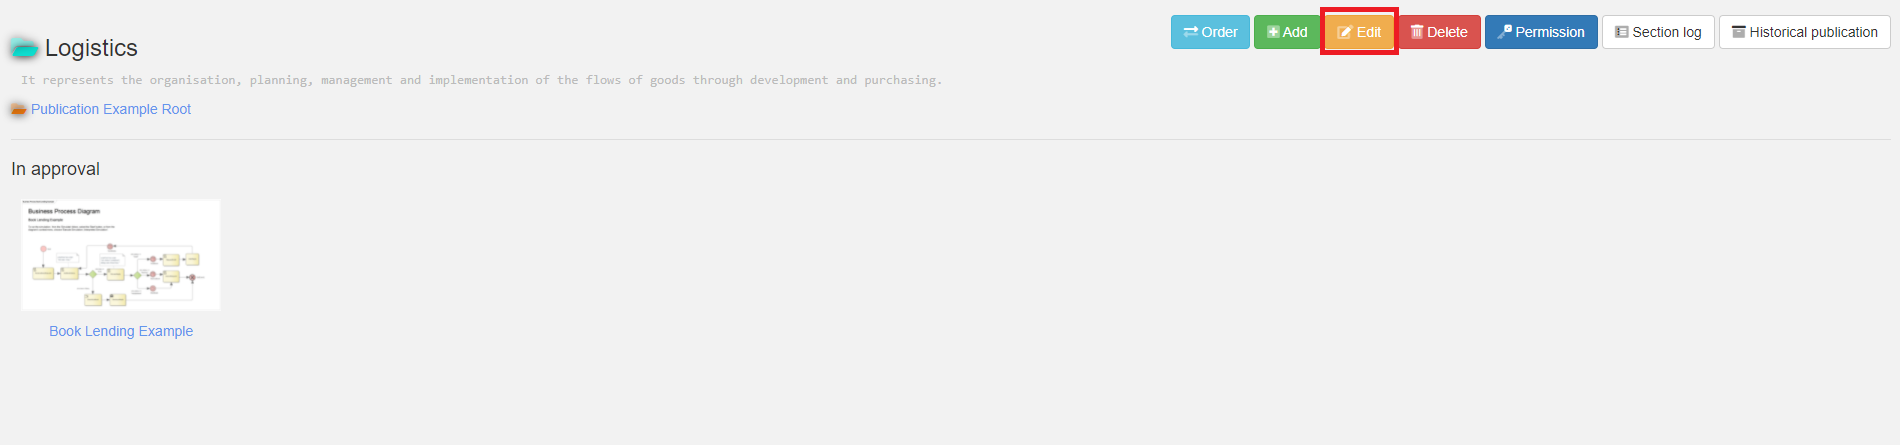
After moving a section to the desired order, click on the "Order" button again, see the first picture, and further moving of sections will not be available.
Creating a Section
Sections can only be created by a user who has been assigned the "Owner" role in the current or parent section.
The section can be configured whether read access is enabled by default - then users or groups that cannot read can be explicitly selected, or whether read access is disabled by default - then users and groups are explicitly enabled. Another configurable feature of the section is whether published diagrams are immediately displayed in the section or whether approval is required (before publication).
To create a section, the user clicks on the "Add" button.

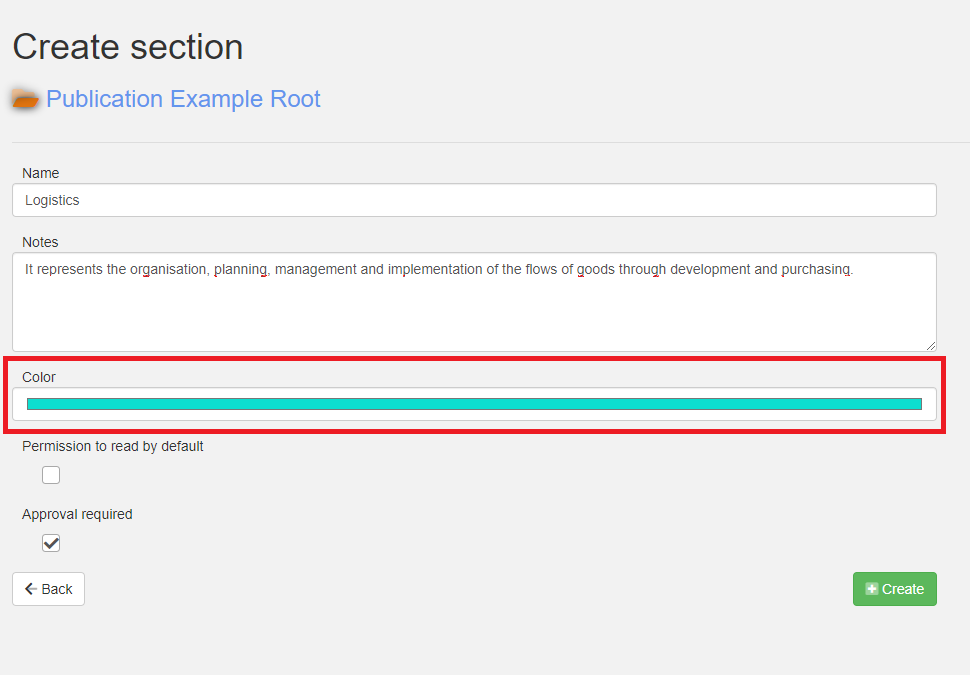
The following dialog will be displayed to the user.
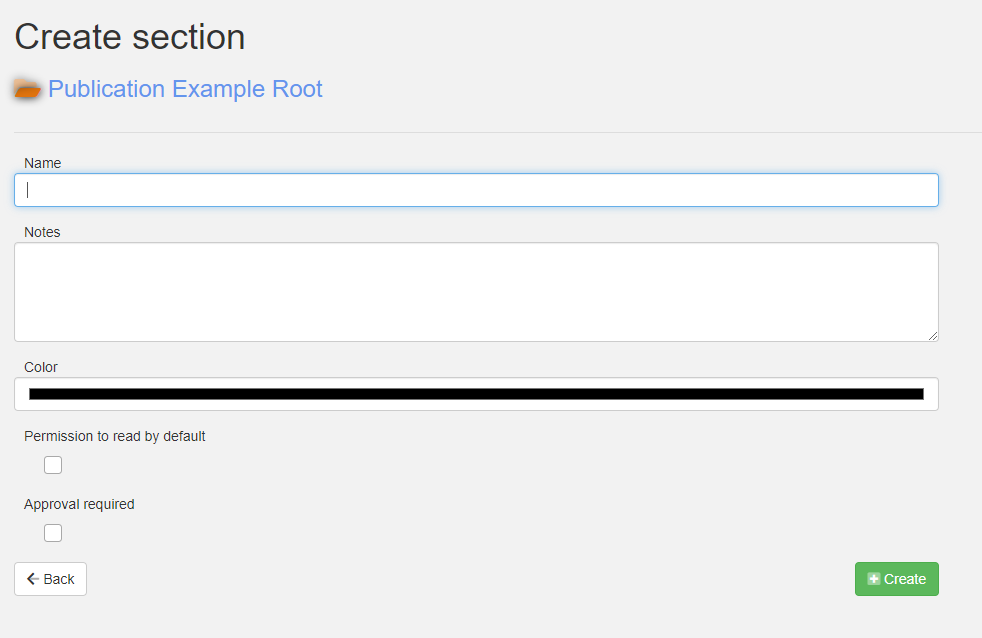
In the dialog, the parameters of the newly created section are entered and the rights are set.
- Section name
- Section description
- Section color
Rights
- Reading is allowed:
- When checked, users/groups can default to read the package and any child packages that do not have the default read disabled.
- When checked with an "x", users/groups cannot default read a package and all its child packages that do not have default read enabled.
- With an "empty square", the user/group inherits default privileges from the parent packages.
- Approval required":
- When checked, diagrams are added to the publication in the "To be approved" state. When unchecked, the status is "Approved.
To change the color, the user clicks on the color label, then a mini dialog pops up to set the color.
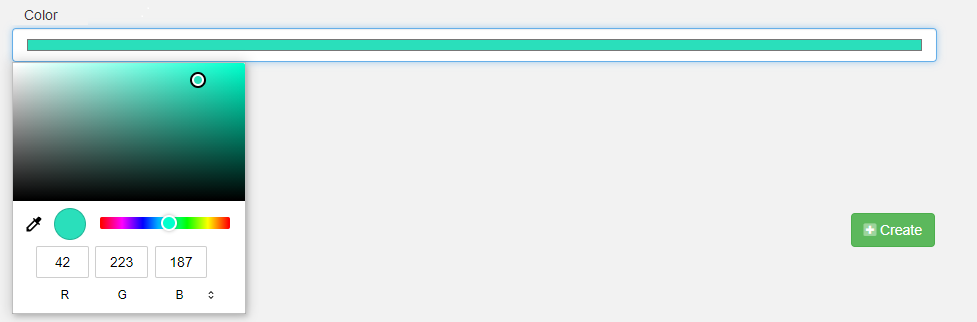
The colour selection dialog responds in two ways:
- Left-click and hold
- Left-click and hold the mouse button.
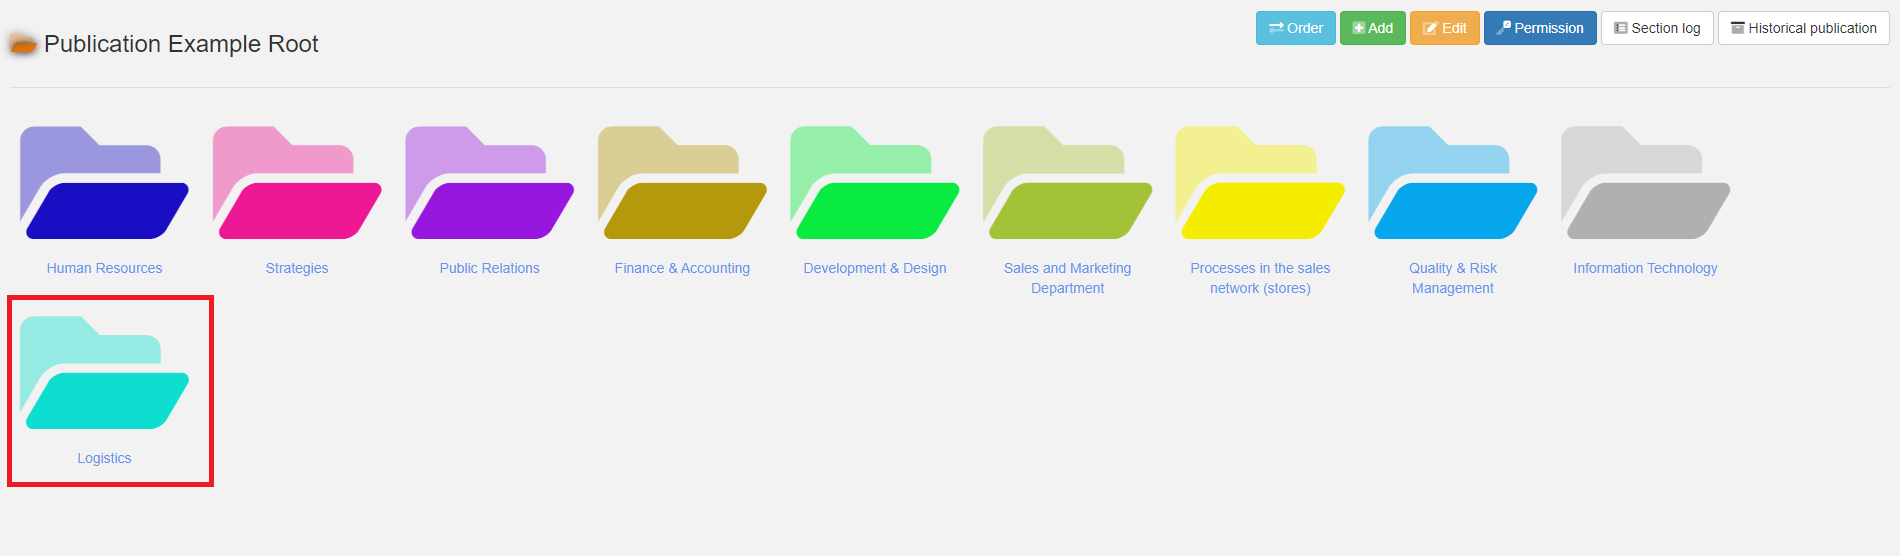
If everything is set, the user clicks on the "Create" button.
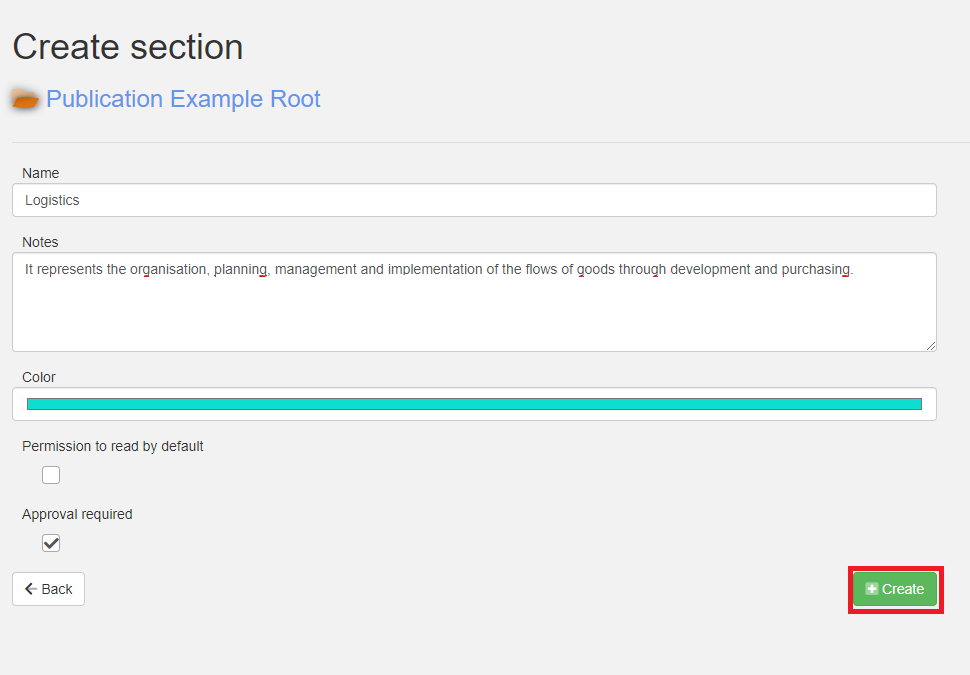
The section has been added.
Edit a Section
In the section being edited, the user can edit the "section name", "section description", "section color", can change the "Reading allowed" and "Approval required" rights.
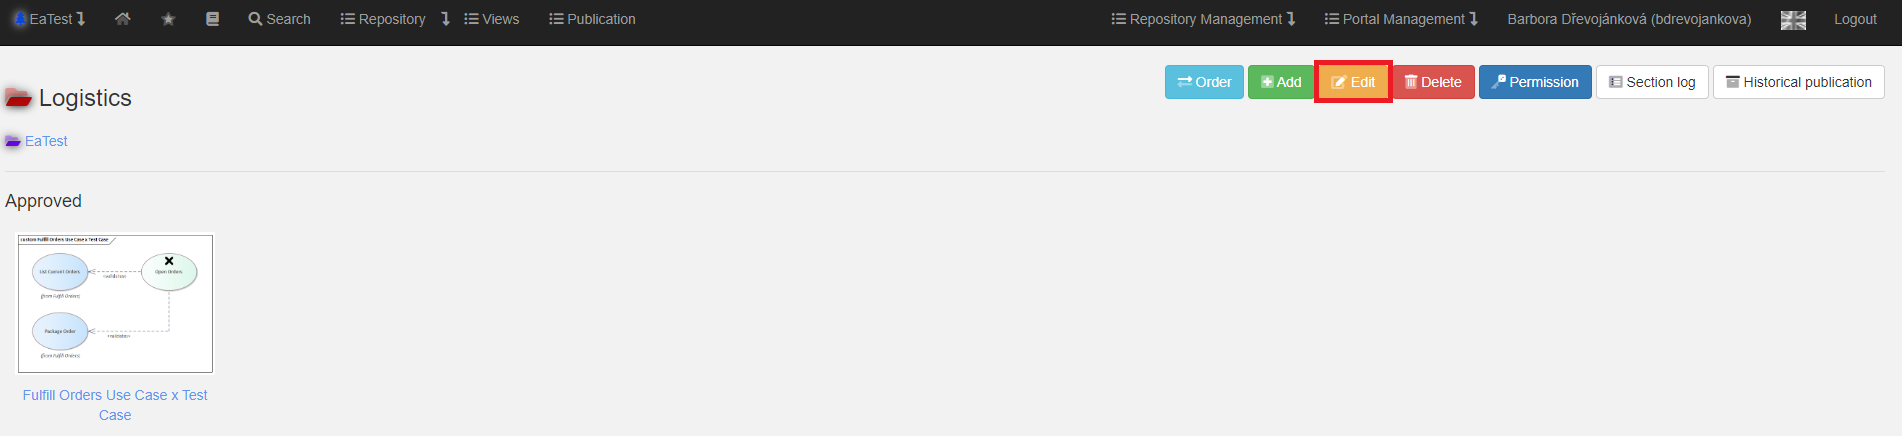
To edit a section, the user clicks on the "Edit" button.
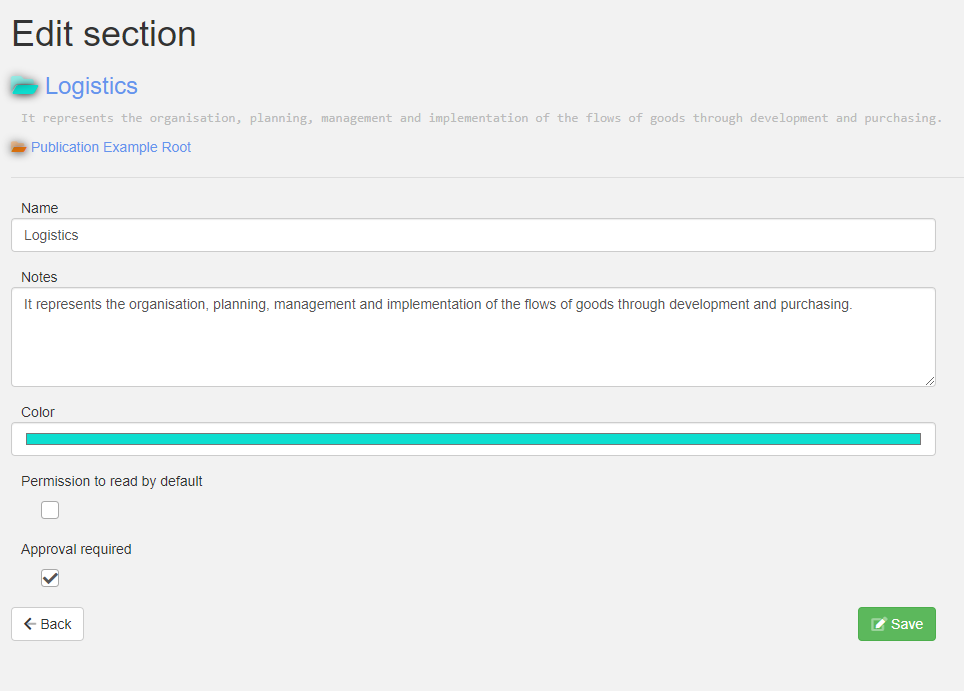
The user is presented with the following dialog where he can edit the "title, description and colour" of the section, as well as change the "Reading allowed" and "Approval required" rights.
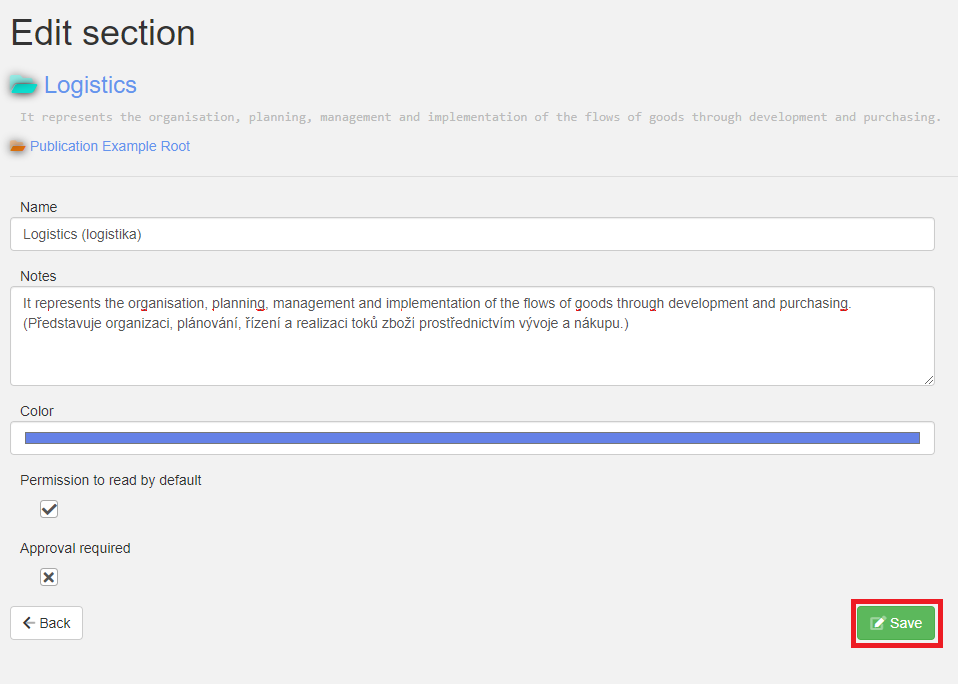
If everything is set, the user clicks the "Save" button.
After clicking on the "Save" button, an editing dialog will appear with the warning message "After saving, the settings in the child sections will be deleted".
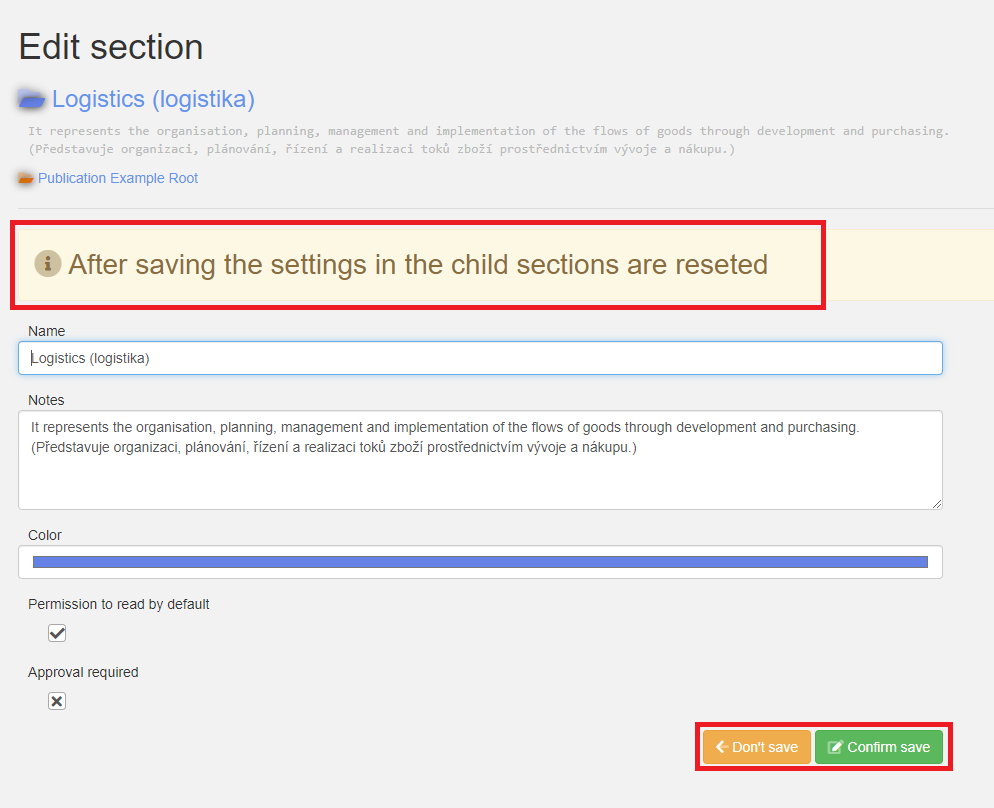
If the user does not want to confirm the save, he clicks on the "Do not save" button and this returns the user to the "Edit section" dialog.
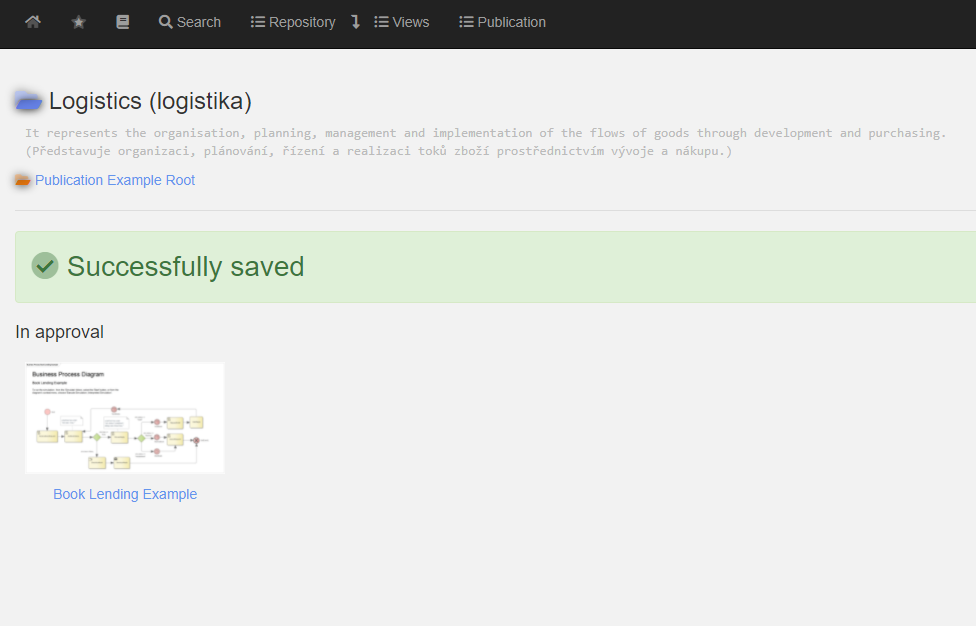
If the user wants to confirm the edit, he clicks on the "Confirm save" button and the user is redirected to the edited section where he can see the message "Successfully saved".
Delete a Section
Deleting a section is used to delete that section, while also deleting subordinate sections and publications.
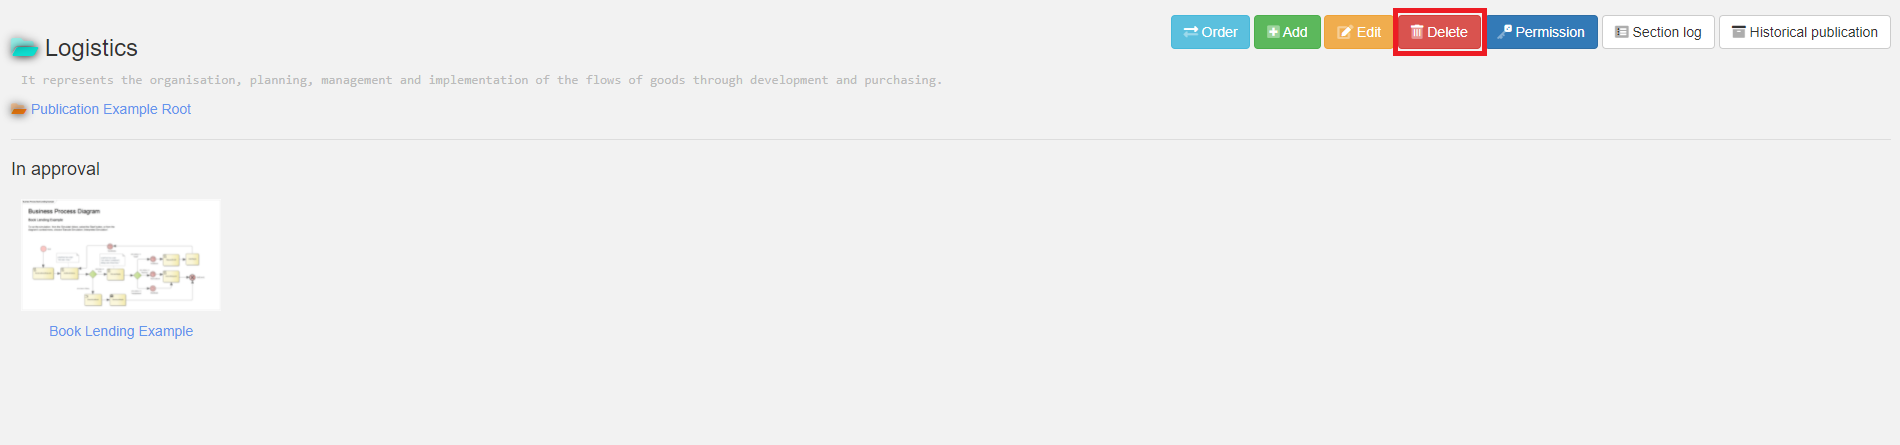
If the user wants to delete a section, he clicks on the "Delete" button and the "Delete Section" dialog is displayed.
The dialog shows the name, description, section color, and rights of the section the user wants to delete.
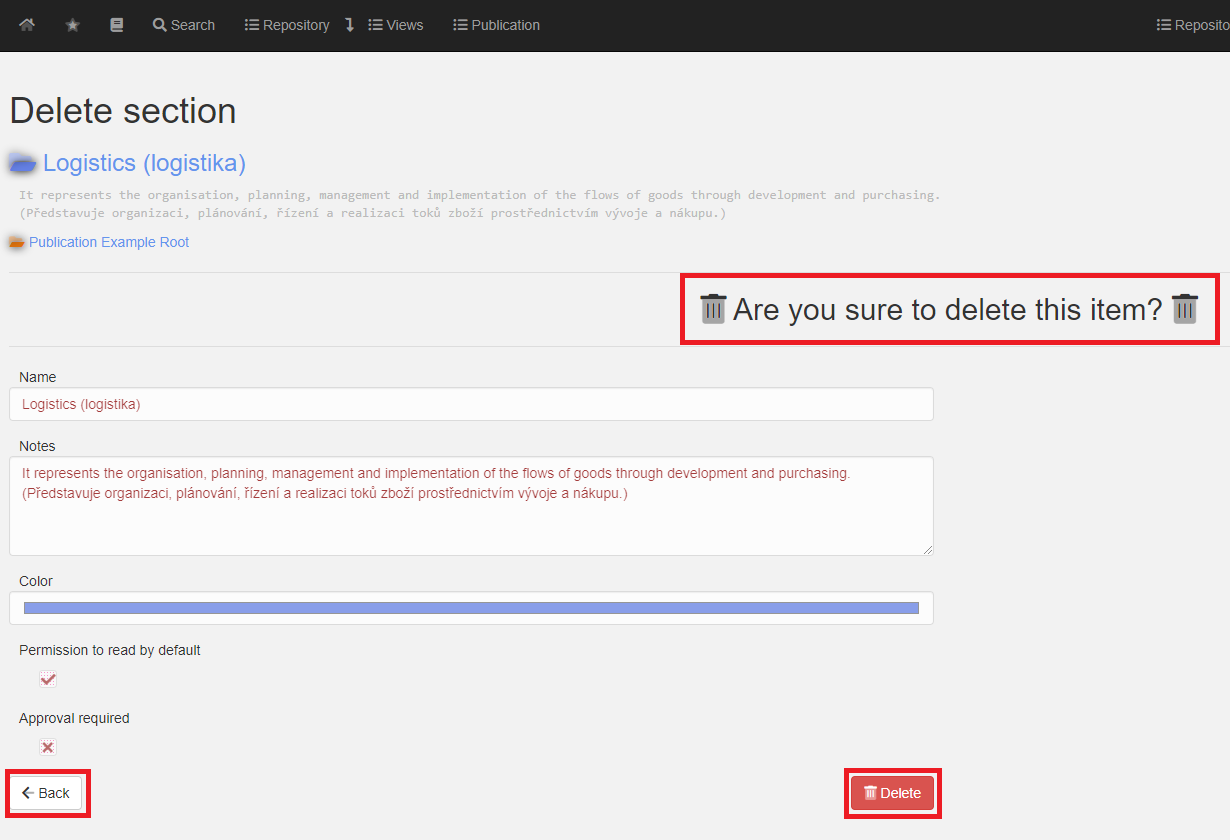
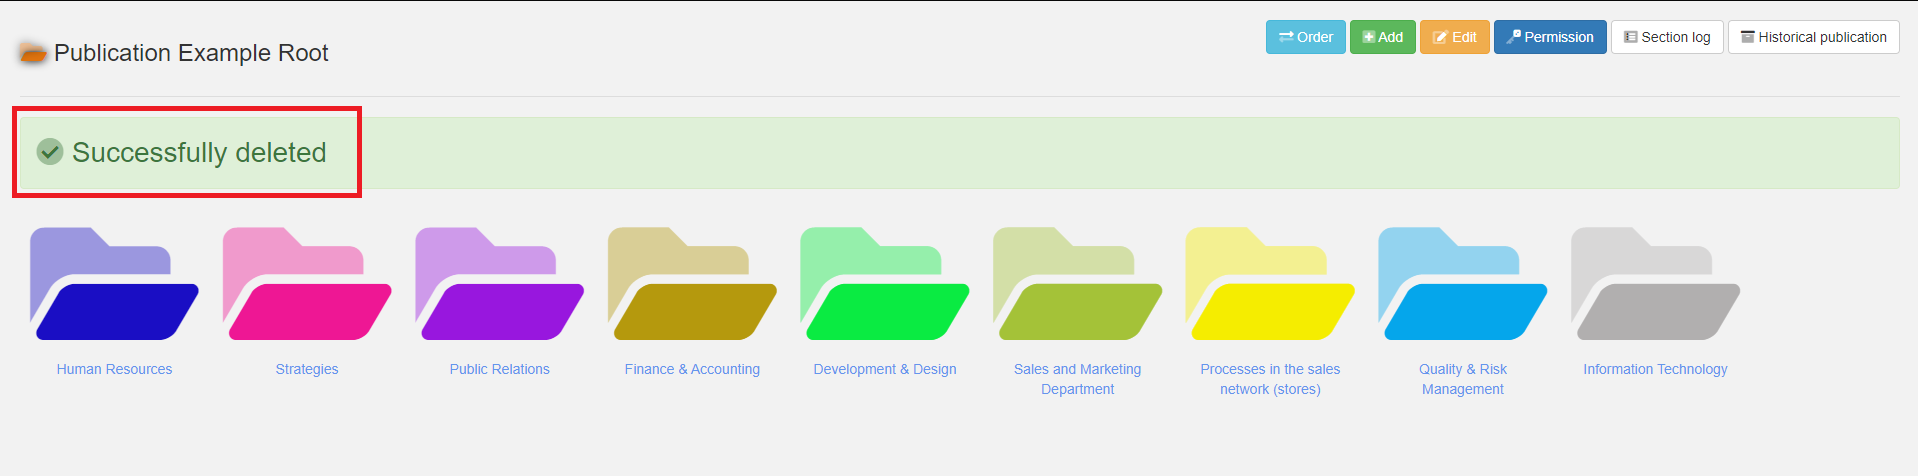
The warning message makes sure that the user really wants to delete the section. If not, the user will click the "Back" button which will return the user to the section and if the user really wants to delete the section, the user will click the "Delete" button, then the user will see a dialog with the warning message "Successfully deleted".
Publication statuses
Publishing a Diagram
The publishing of the diagram is done from the repositories. Publication can be done by any user with access rights to the repository.
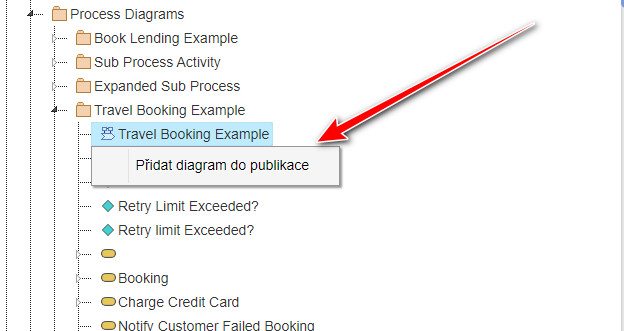
The publishing dialog is accessible via the right button in the repository tree.
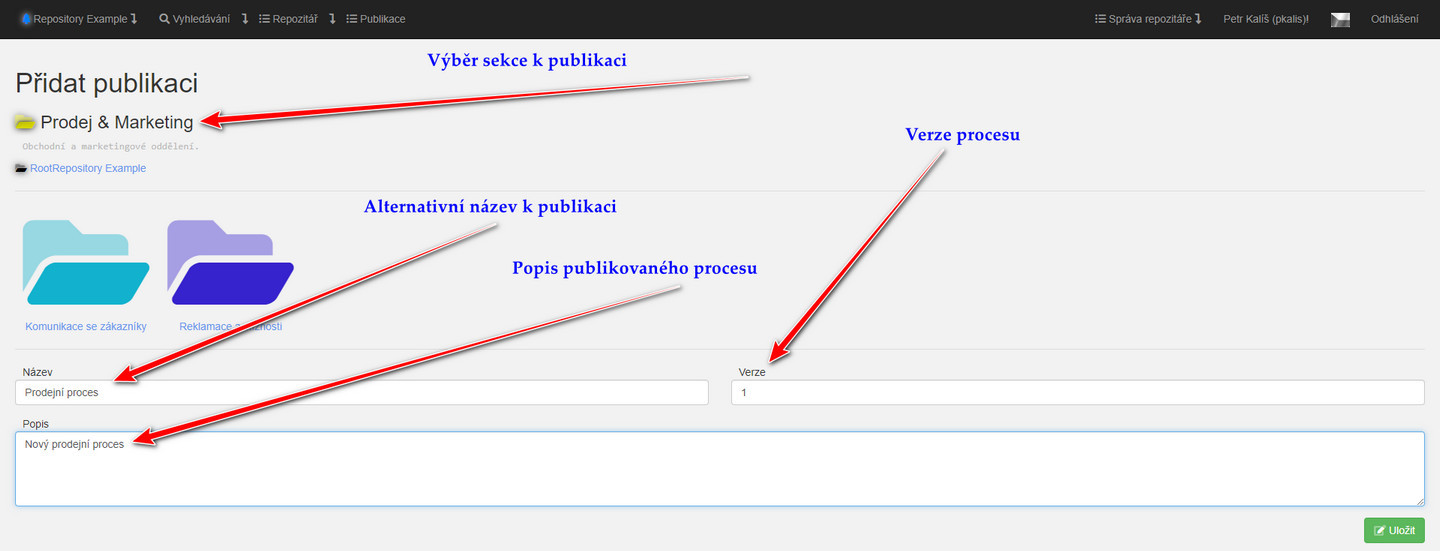
The dialog for publishing the diagram appears.
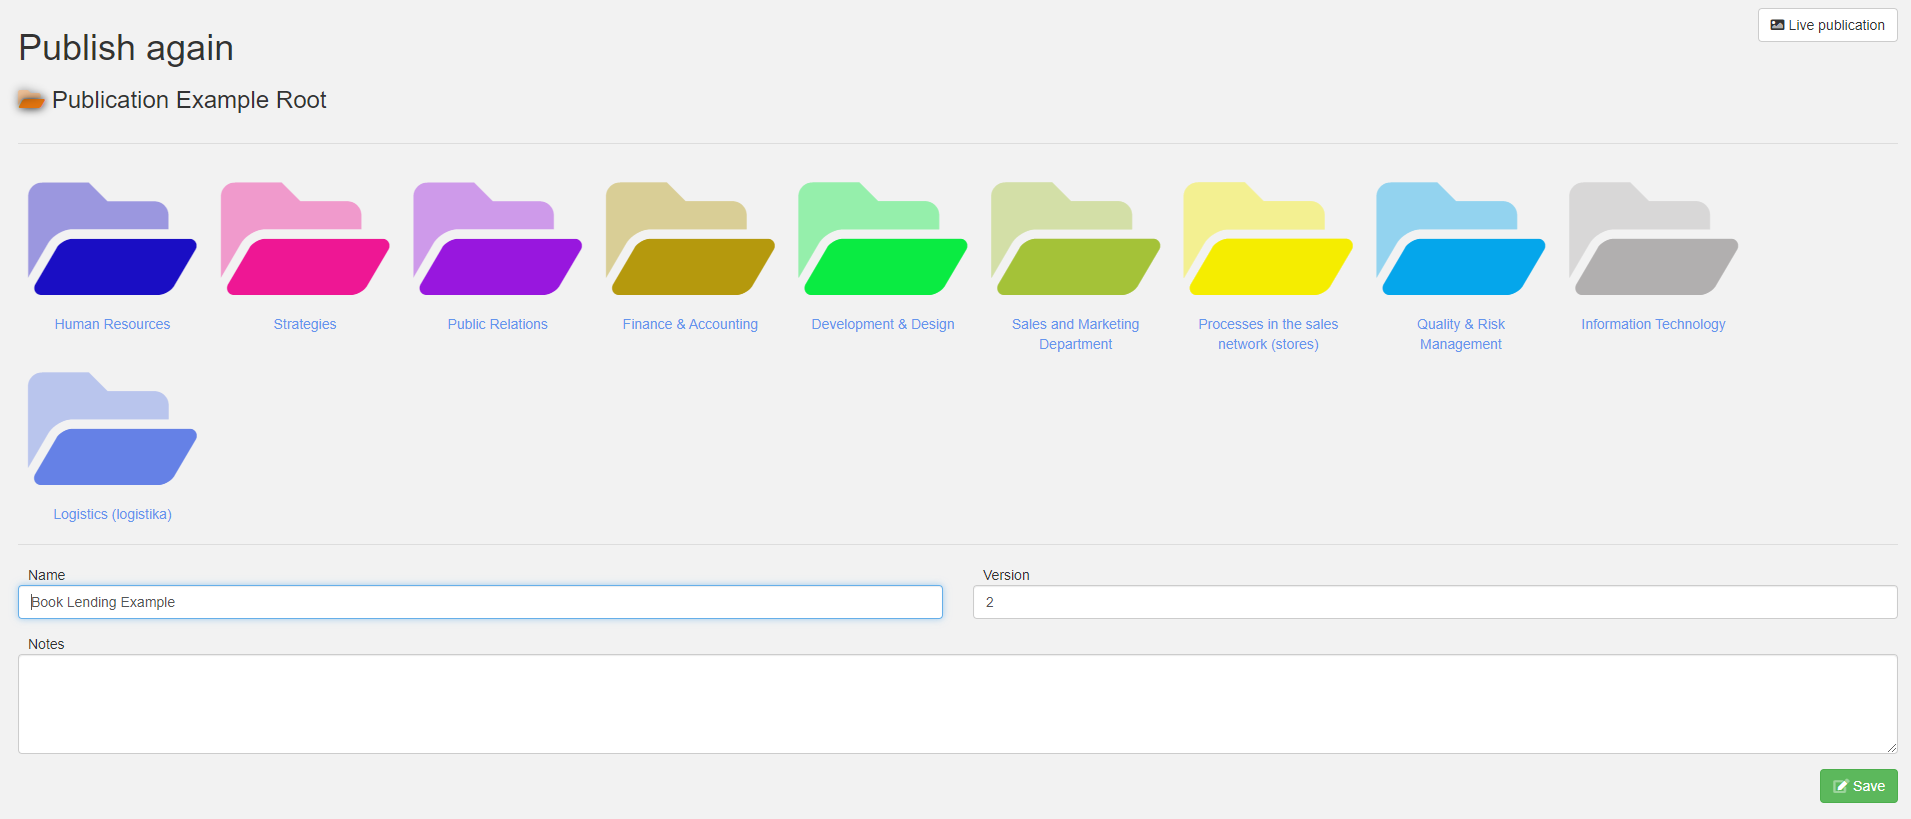
The user fills in mandatory and optional data:
- Section to which the diagram should be published - the user selects the section to which he wants to publish the diagram by clicking
- The name of the publication - is pre-filled from the title of the dialog, the user can change the title freely
- Version - is pre-populated, the user can change it freely
- Note - additional description of the publication (optional more detailed text)
Once the user has clicked the "Save" button to publish the diagram, it will be displayed in the appropriate section within moments. At the moment of publication, a copy of the diagram is created, including the elements and their details (up to a configurable level). The user can therefore edit or delete the original diagram without affecting the published or currently approved diagram. The copy is not created in the EA repository, but in the Infoport metadata, so the repository is not affected by this functionality.
A diagram can be published to multiple sections with multiple versions.
Approval of Publications
If approval of diagrams is required in a section, then the diagram will be displayed in the section only to owners and approvers – until it is approved or rejected.
The section owner or approver can view the relevant diagram, including metadata (who wants to publish the diagram and when), version, alternative name, etc.
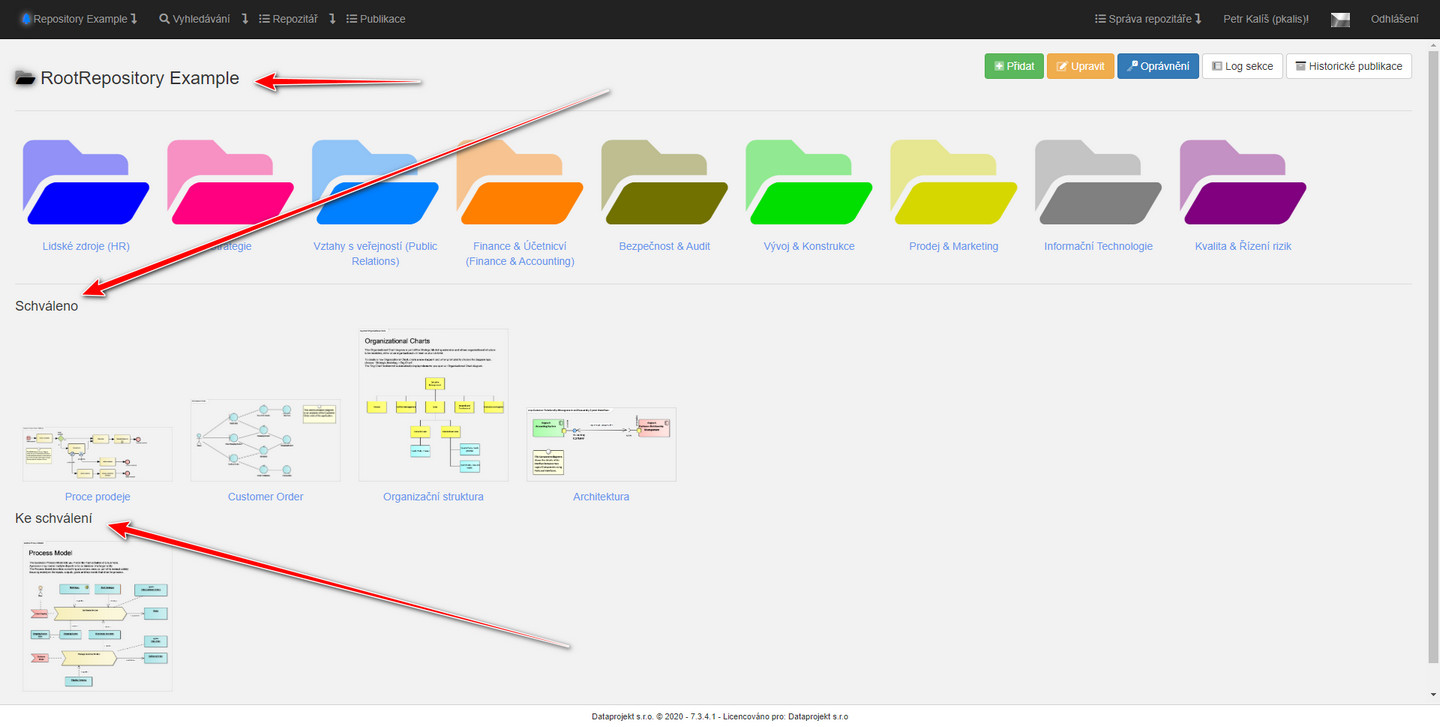
In the section, the user sees a list of publications designated "For Approval" and a list of "Approved" publications.
Rejected publications can be viewed using the "Historical Publications" button.
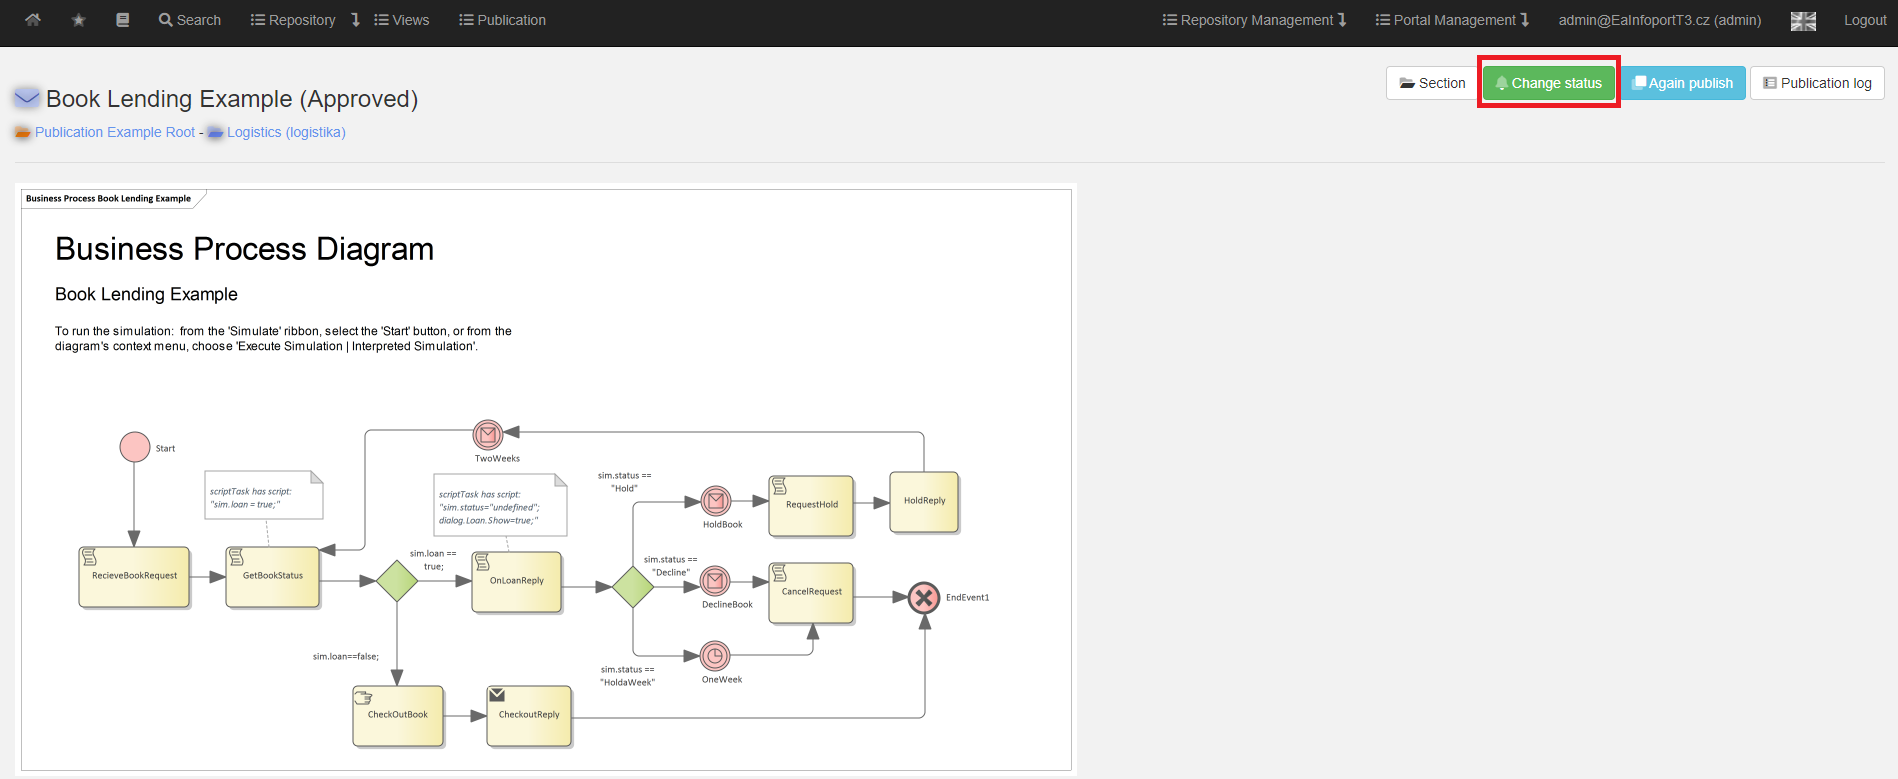
In the "To be approved" section, the user clicks on the preview of the diagram he wants to reject or approve.
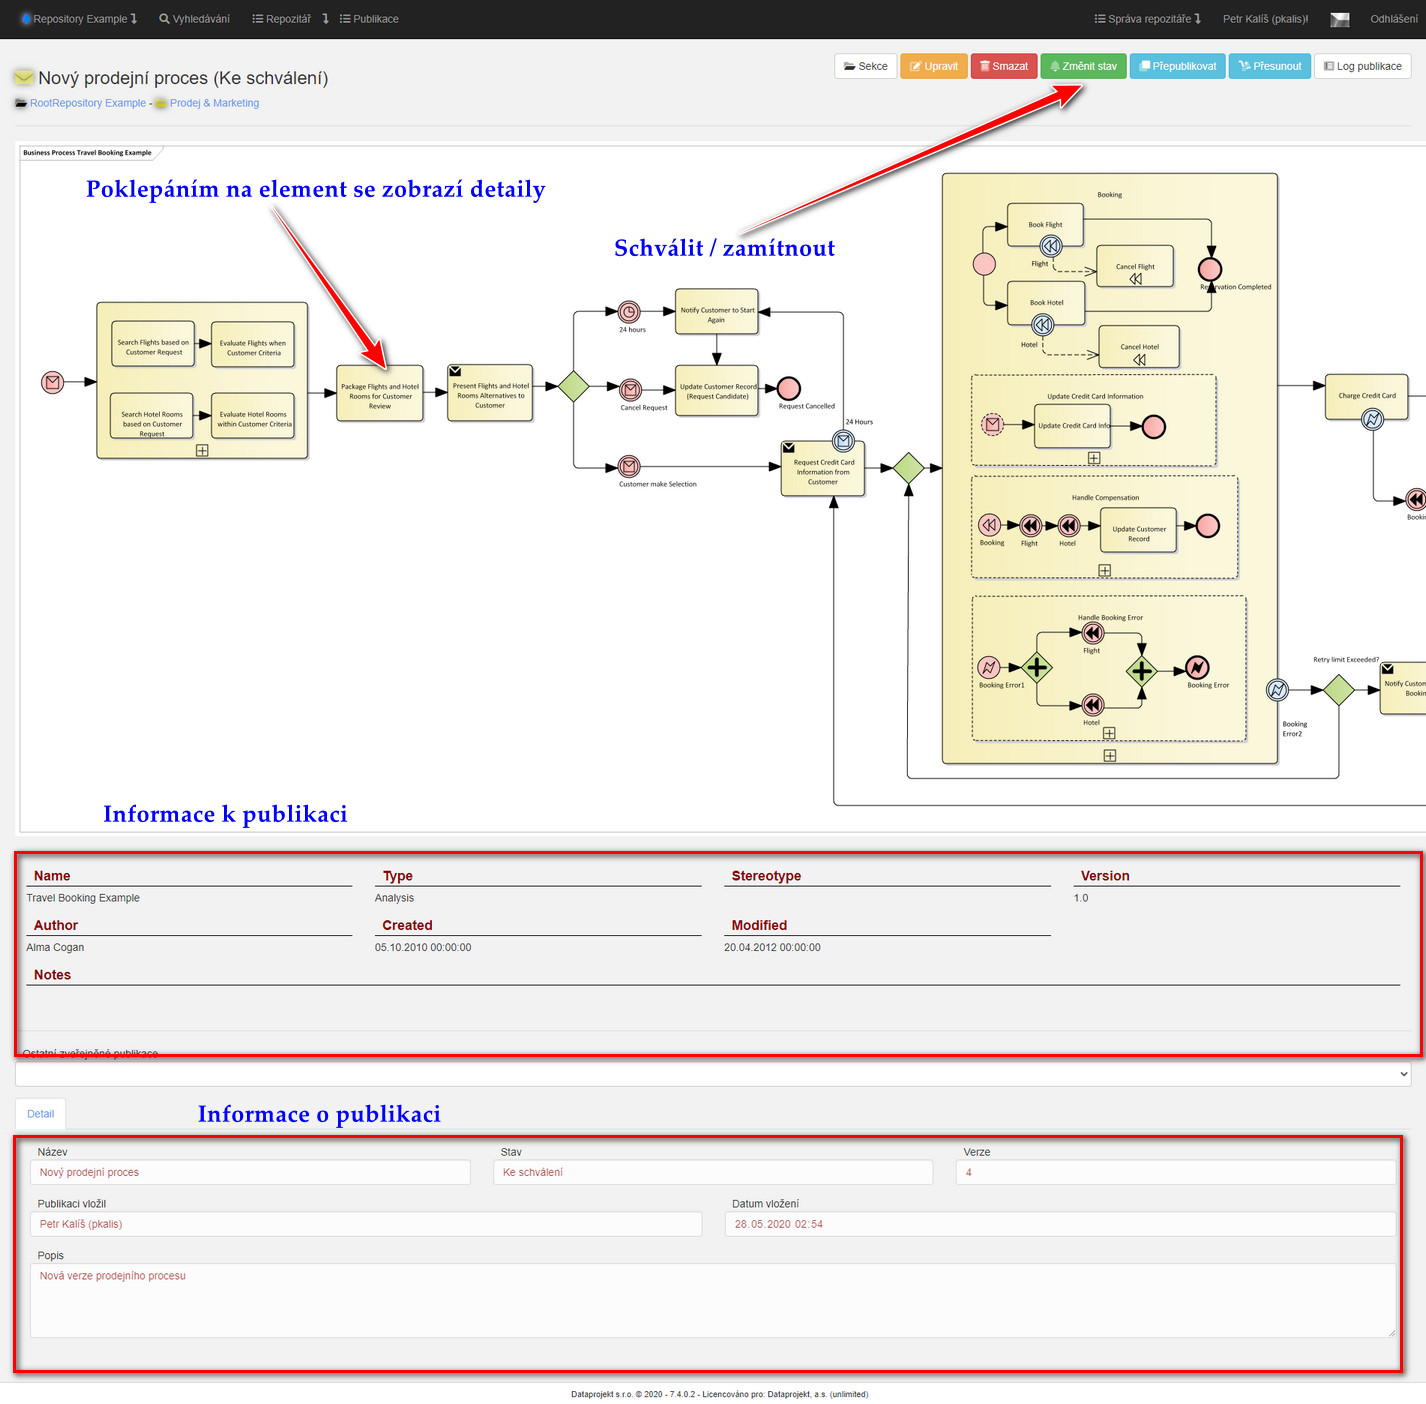
To approve or reject, the user clicks on the "Change Status" button.
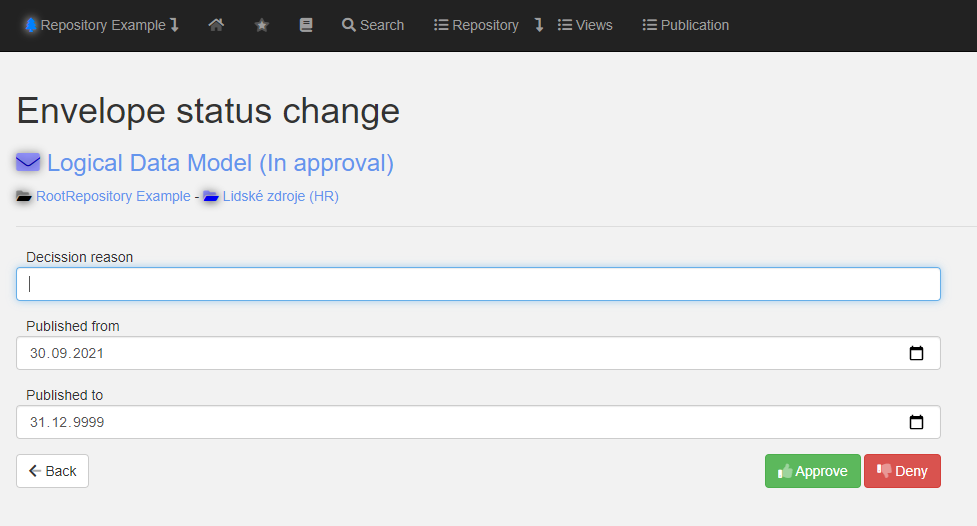
When approving or rejecting, the user must state the reason for the decision (e.g., found an error in the business process, etc.)
The validity of the publication is pre-populated by the system, published from is set to the current date and published to is set without date limitation.
Both of these values can be changed by the user. For example, he sets that version 1 of a particular business process is valid until 31.1.2018 and the new version of the same process (2) is valid from 1.1.2019.
After filling in these data, the user clicks on the "Approve" or "Deny" button.
If the "Approve" button has been used, the dialogue will move to the "Approved" section and if the "Deny" button has been used, users will not see it in the section and it is available in the "Historical Publications"
Historisation of Published Diagrams
Historical artifacts (these are artifacts that have expired publications) are used to preserve rejected and historicized diagrams.
Because it is still preserved in the Infoport metadata, they can be re-approved if necessary.
On the detail of an approved publication, the user has the option to expire the publication, i.e. historicize it.
The user clicks on "Change Status" to see the "Change Publication Status" detail.
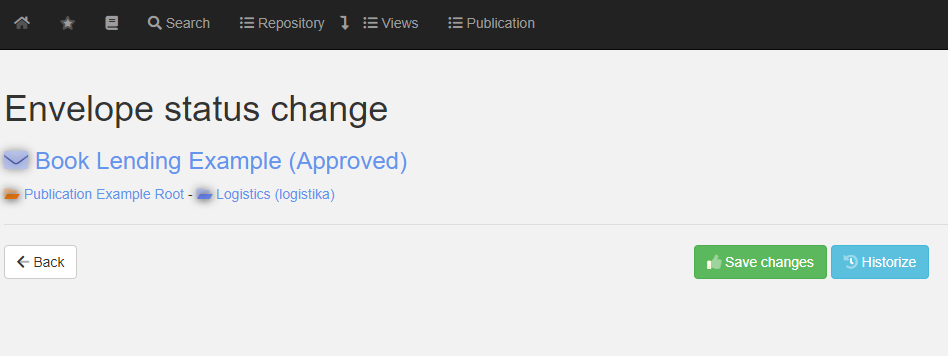
Once the user clicks on the "Historicize" button, the publication is moved to the "Historical publications".
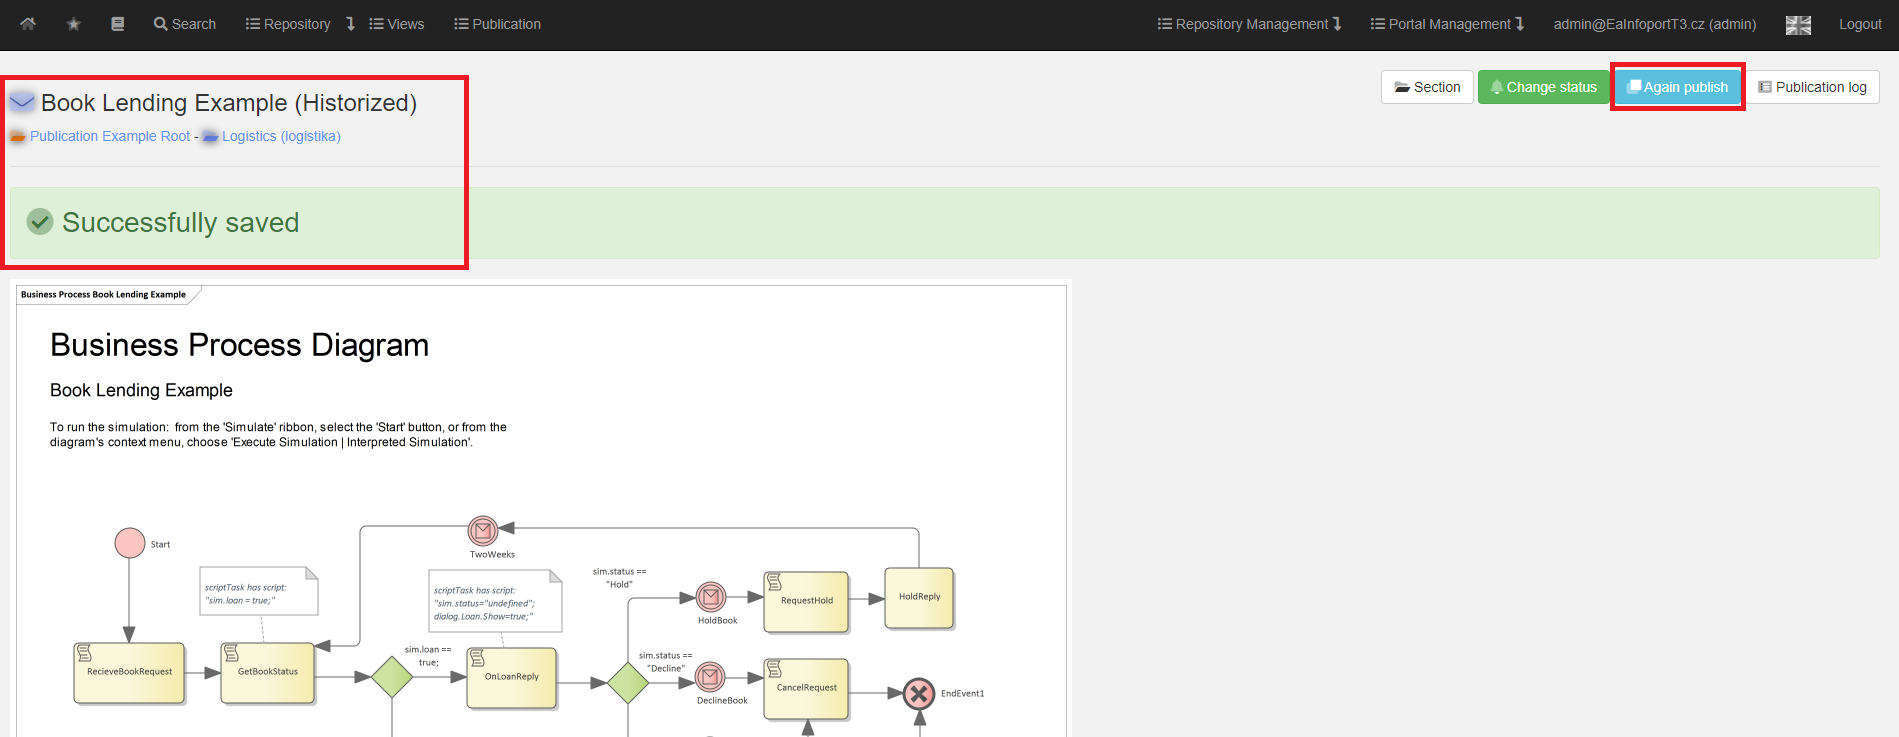
The user can click on the "Republish" button and select the section in which to save the publication.
Logging Changes in a Publication
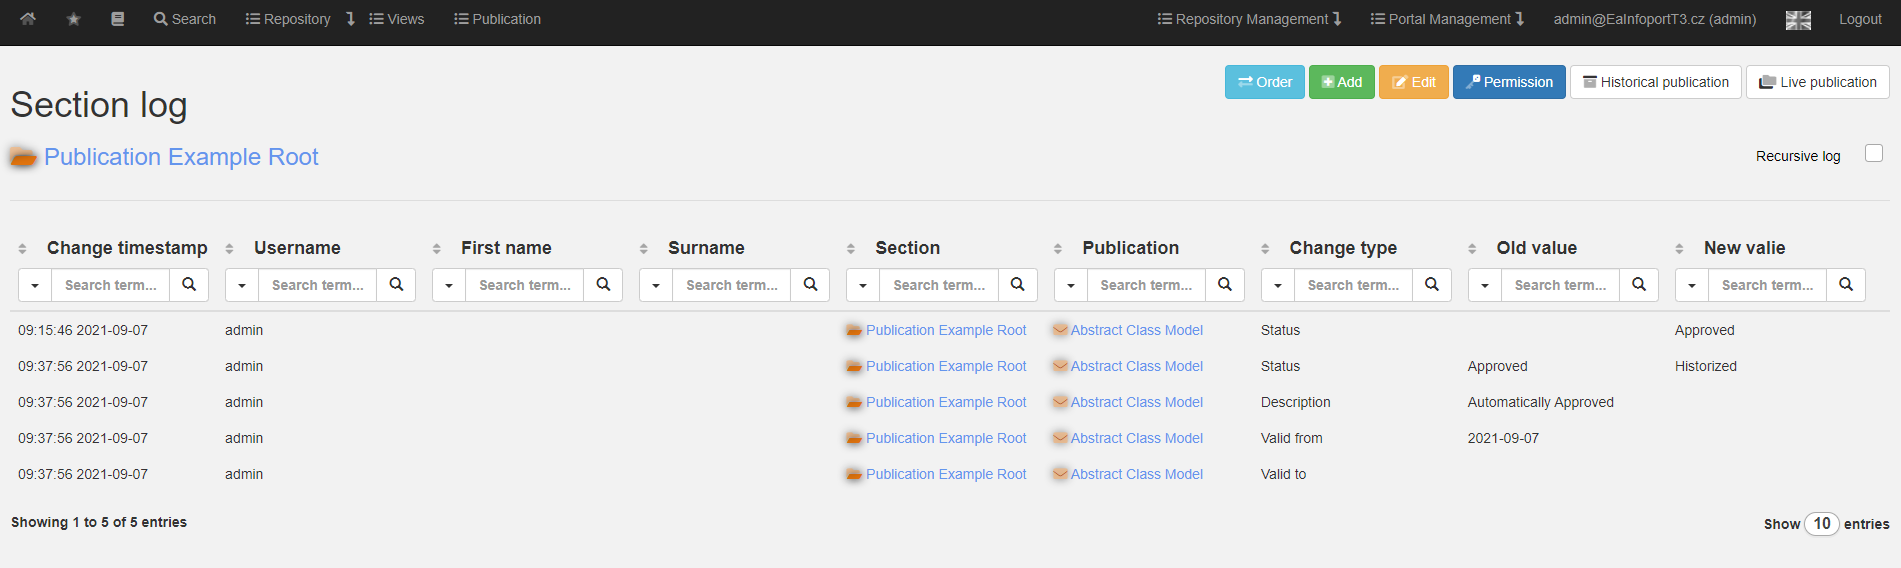
All changes to the published diagram (publication, approval, rejection, adding to another section and other activities in the publishing module) are logged. The log can be displayed in the UI.
The user can view the report below by clicking on the "Section Log" button located on the section tab.
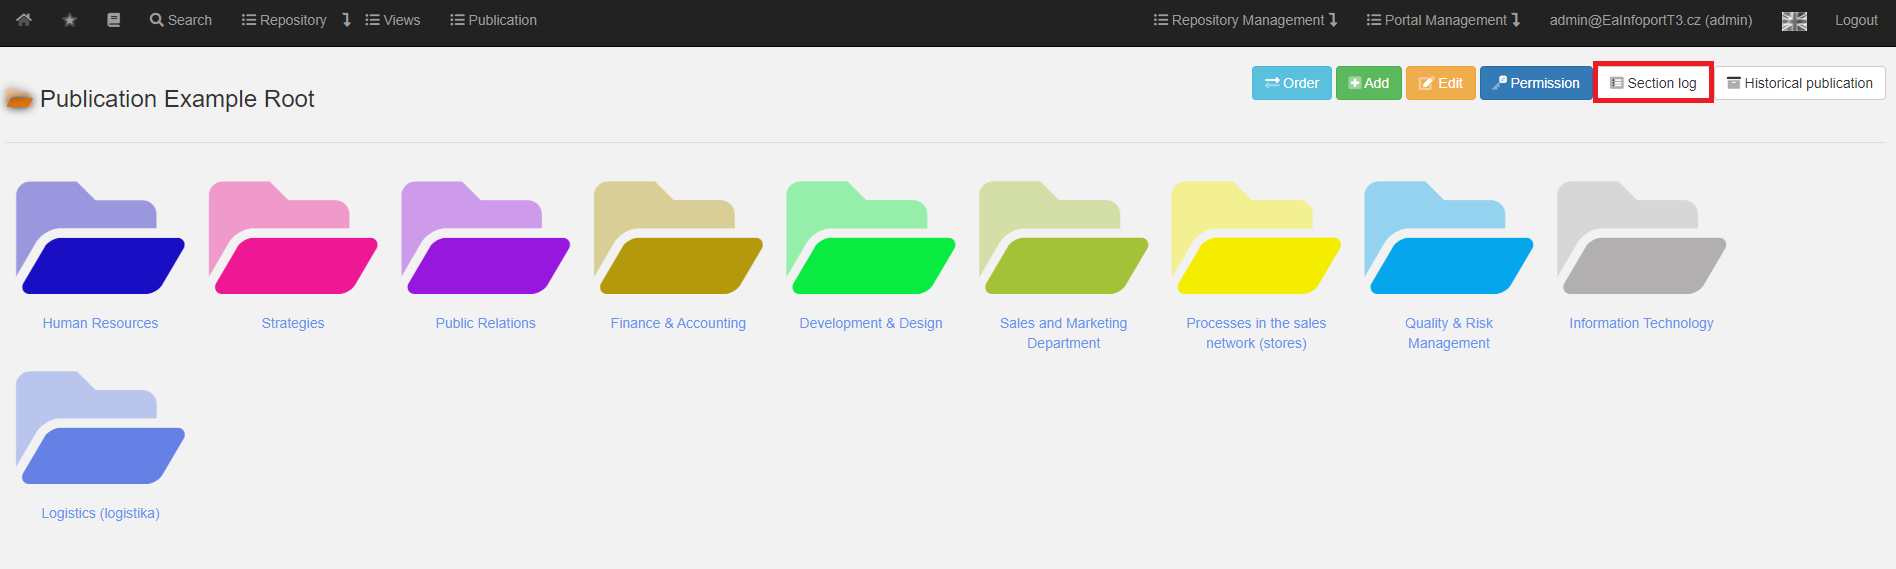
In this table, you can click through to sections or publications where a change has been made.
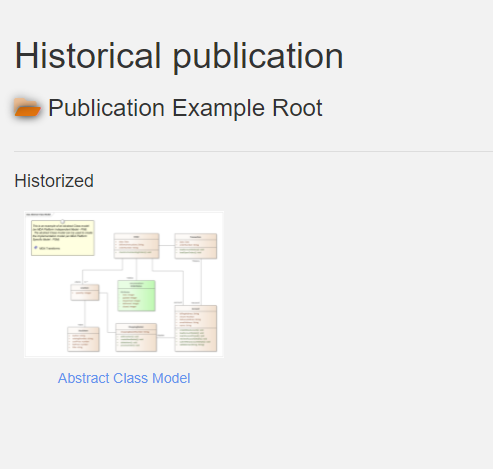
Historical Publication
Historical artifacts (these are artifacts that have expired publications) are used to preserve rejected and historicized diagrams.
From these states, they can be re-approved if necessary.
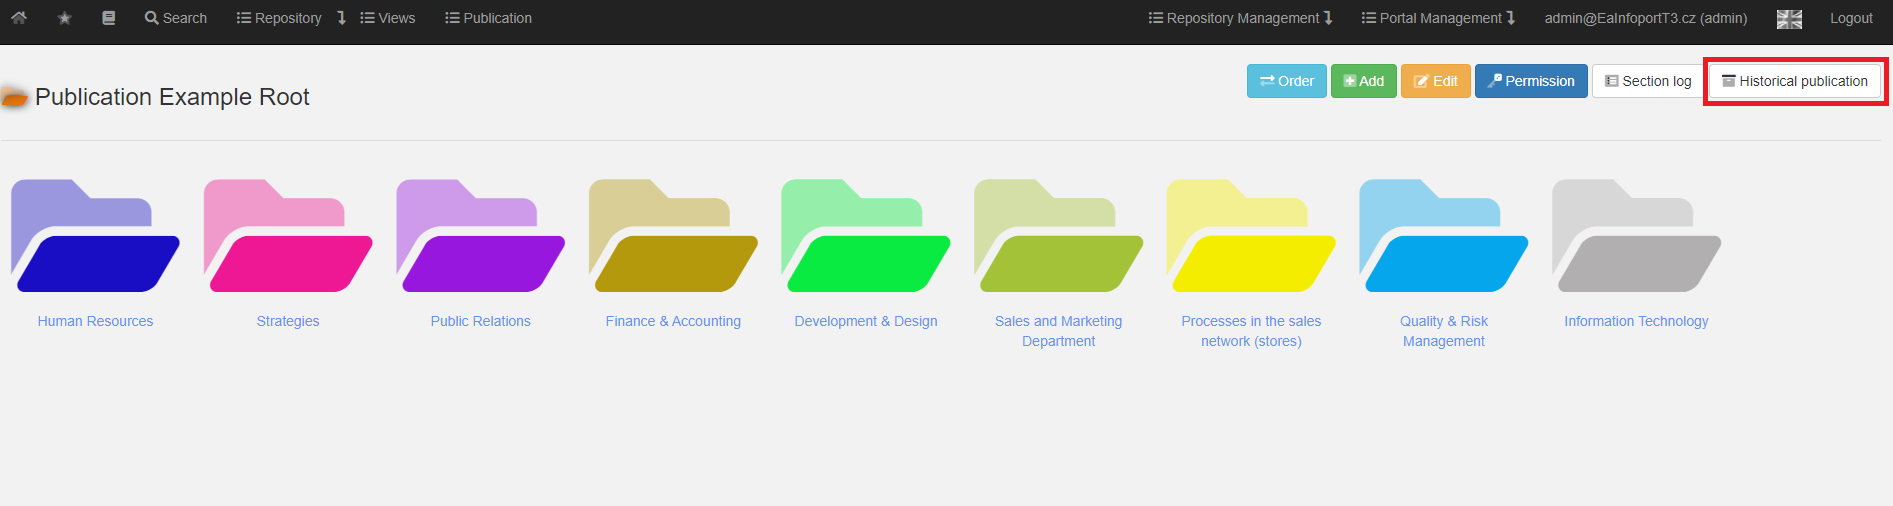
The user can view the list of historicized diagrams and also view the historicized diagrams (including element details).
It is therefore a very efficient way of versioning.
Setting default section rights
The default section rights settings can be found under the "Edit" icon.
The user will be presented with the following dialog where they can set/change the default rights "Reading is enabled" and "Approval is required".
- Reading is allowed:
- When checked, users/groups can default to read the package and any child packages that do not have the default read disabled.
- When checked with an "x", users/groups cannot default read a package and all its child packages that do not have default read enabled.
- With an "empty square", the user/group inherits default privileges from the parent packages.
- Approval required":
- When checked, diagrams are added to the publication in the "To be approved" state. When unchecked, the status is "Approved.
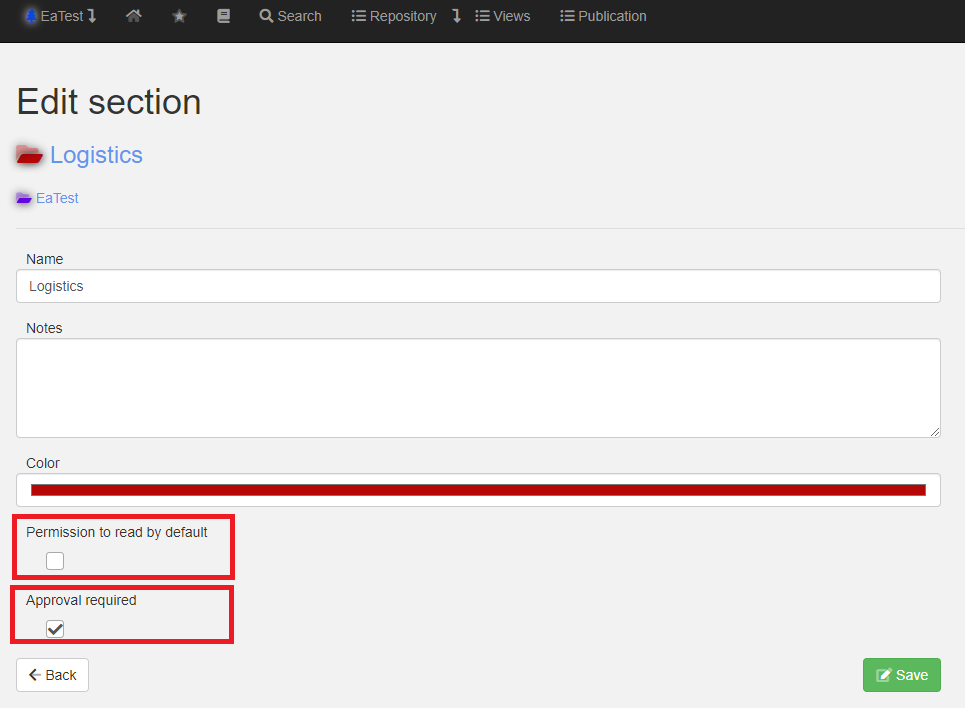
If everything is set, the user clicks the "Save" button.
Rights in the publishing module
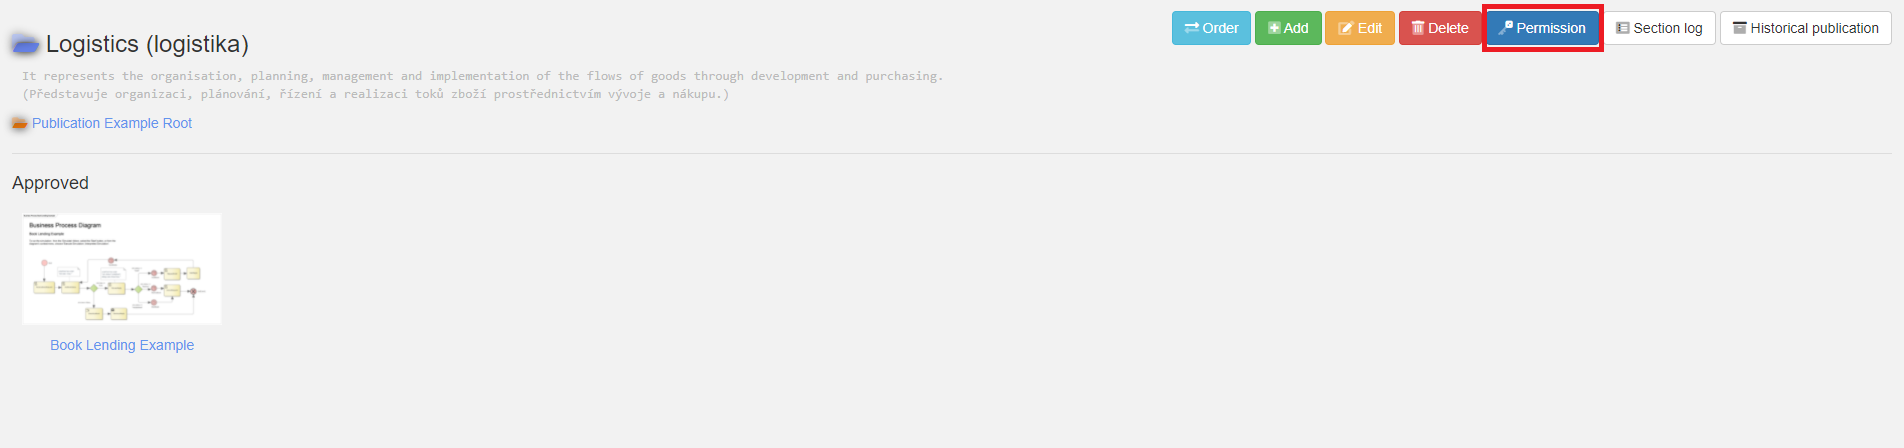
For each section, you can set your own permissions.
If a section does not have a permission set, the permission from the parent section is taken over.
Setting one section:
Setting user and group permissions
There are 3 levels of authorisation:
- The lowest permission is "Reader", who can see the published diagrams but cannot manipulate them. This means that he has no right to approve or reject the publication.
- The "Approver" can approve or reject the publication, or later historicize it.
- The "Owner" has the highest authority. He can approve, reject and historicize a publication. He can set the section name, comments and section color, and most importantly the section permissions.
- The user permission "Owner" has no restrictions in the section and its subsections.
- User permissions "Approver" and "Reader" are affected in subsections where they do not have exclusive personal permission and the default permission is set.
- User permissions take precedence over the default permission in that section. Subsections that do not have the default permission set inherit the user permission.
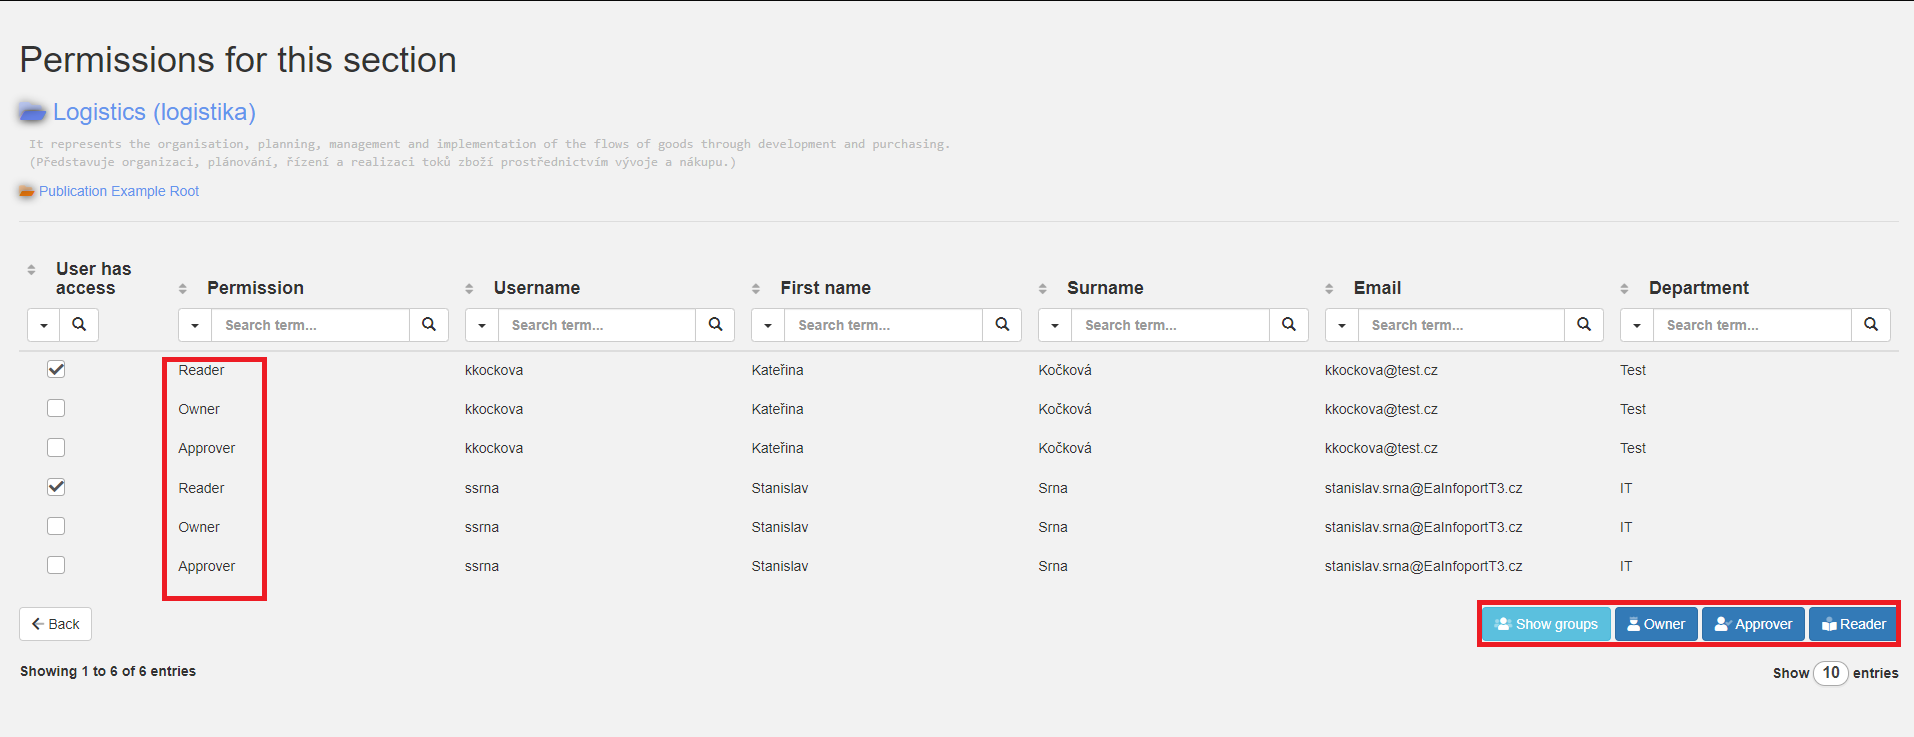
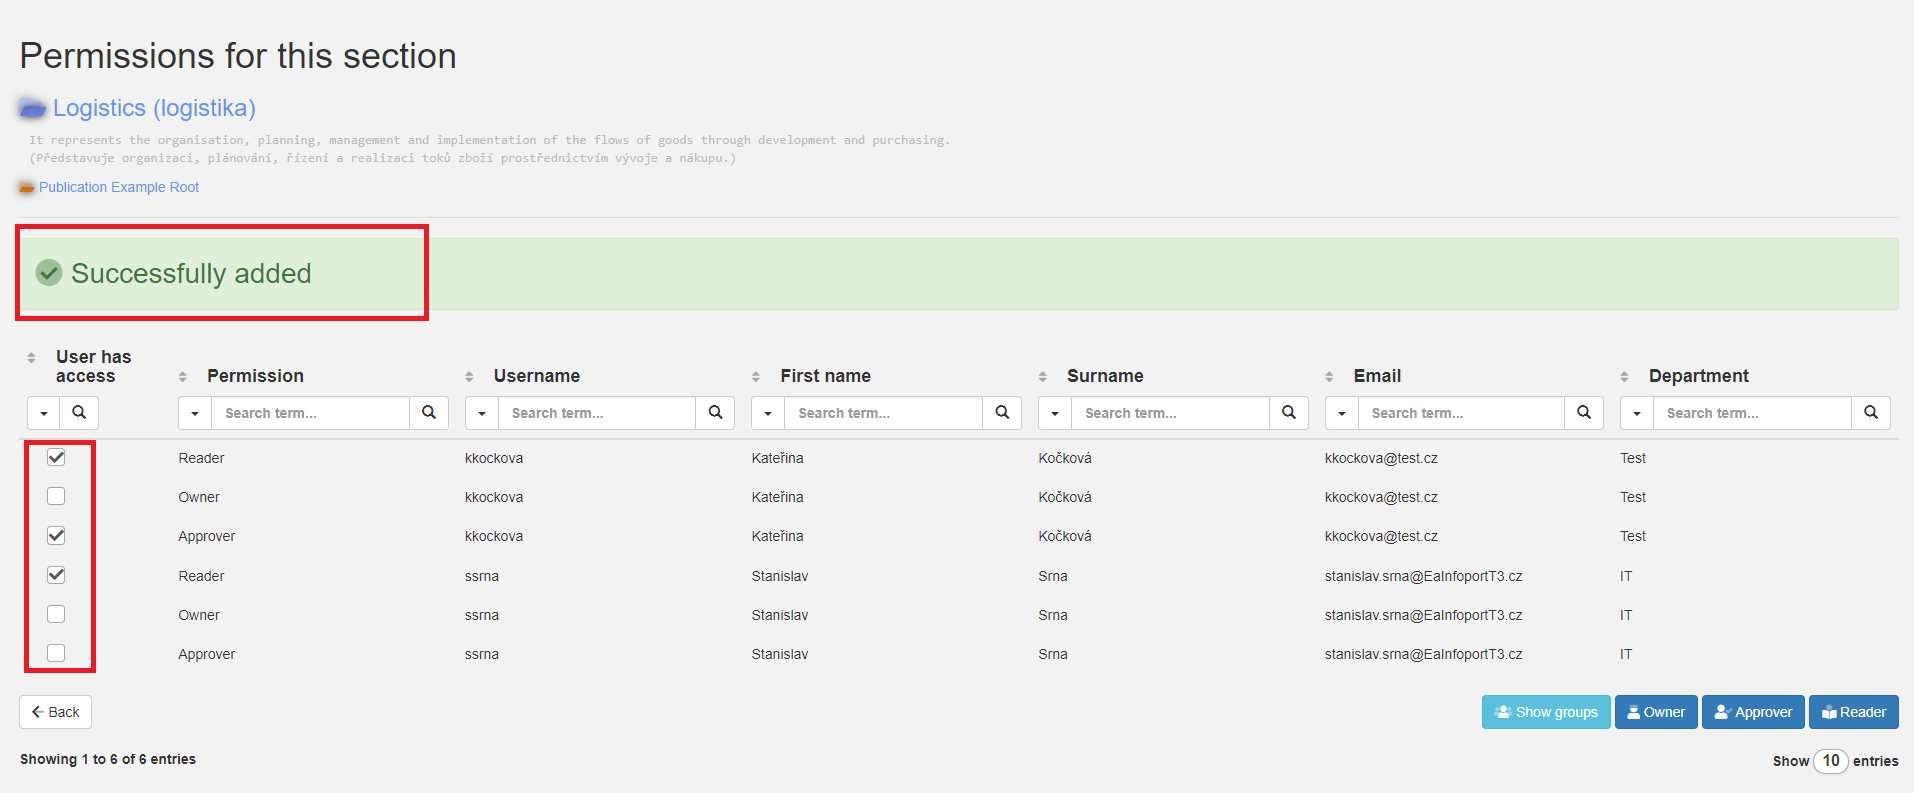
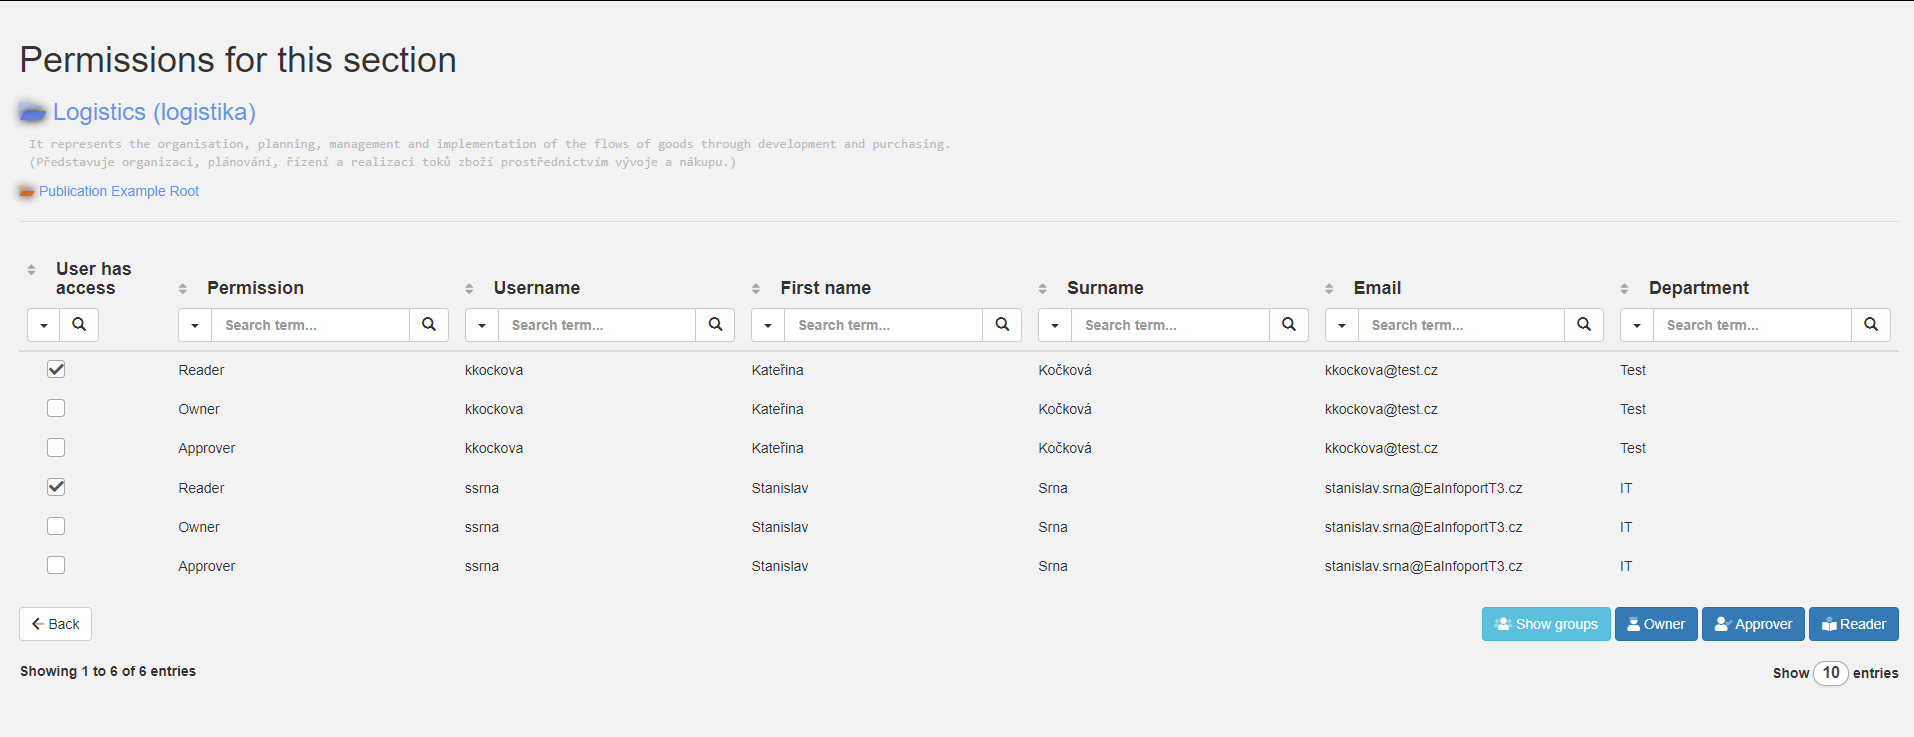
Using the "View users" or "View groups" button, you can view the rights of this section through users or groups.
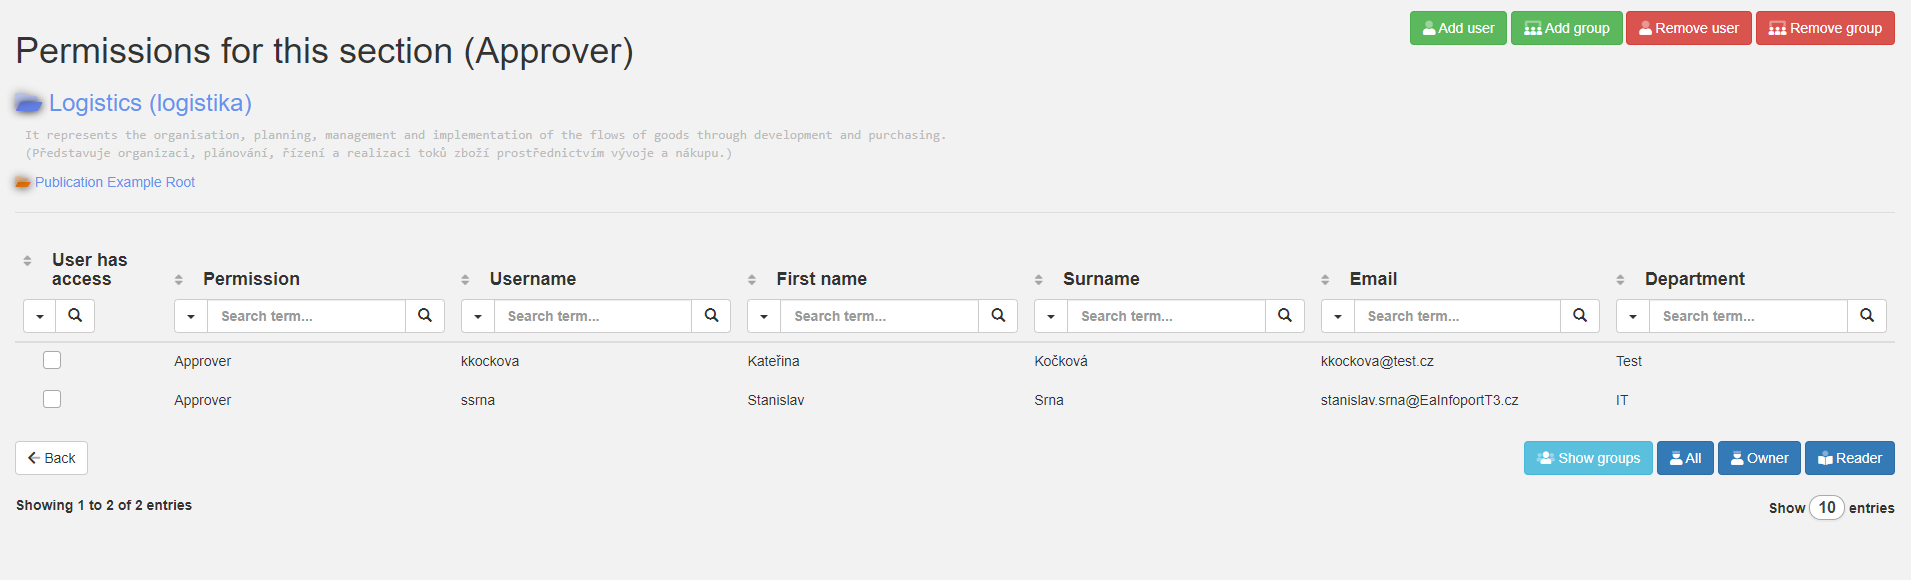
The "Owner, Approver, Reader" buttons are used to filter by role. For example, if you want to see a list of all approvers, click on the "Approver" button.
Adding or removing privileges is changed using a checkbox and after clicking/unclicking, the message successfully added or removed is displayed.