Repository Management
There are a basic permissions in each repository that can be assigned to a user or a group. Access to the repository tree Access to the publication Repository administrator Editor Glossary Access to views Access to publish public keys
- Repository Management
- User Management
- Creating a New User
- Assigning Groups to a User
- Assigning Permissions to a User
- Edit a User
- Remove a User
- Group Management
- Creating a New Group
- Assigning Users to a Group
- Assigning Permissions to a Group
- Edit a Group
- Delete a Group
- Permission Management
- Assigning Permissions to Groups
- Assigning Permissions to Users
- Repository Detail
- Overview of notification subscriptions
- Archive repository
- Repository password encryption
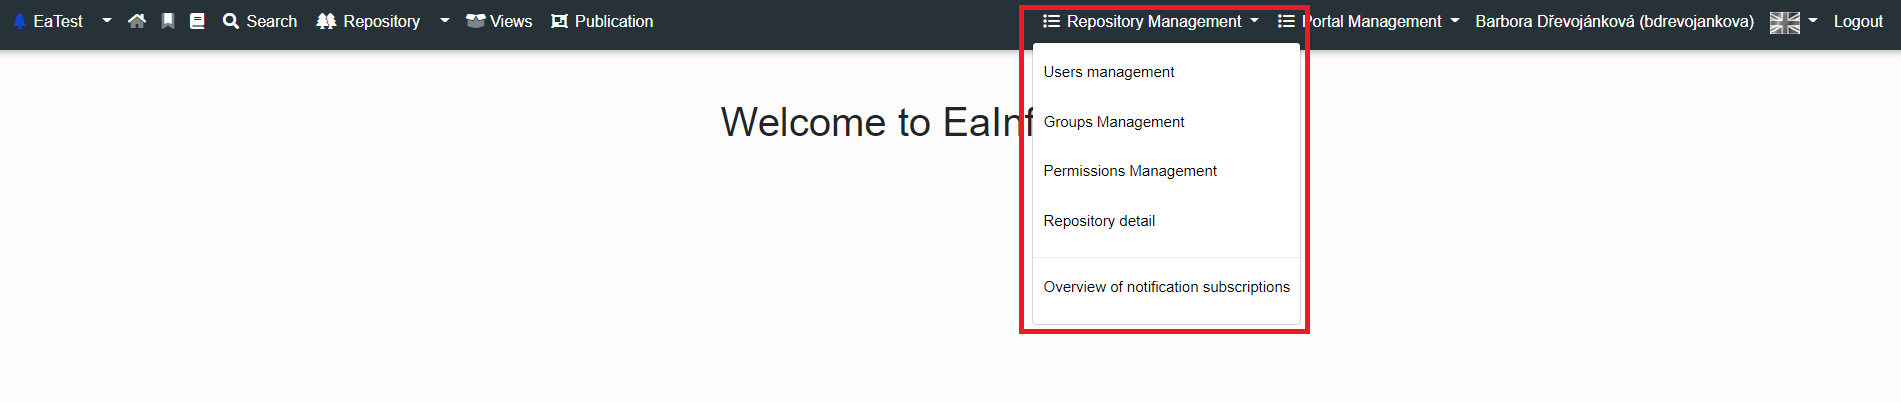
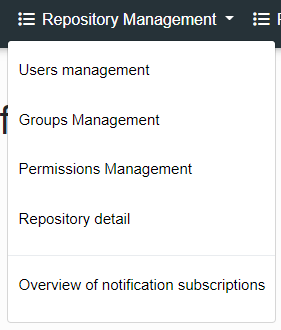
Repository Management
On the right side of the Infoport header we can see a Dropdown menu called Repository Management (Only logged in user with Repository Manager permission).
- Access to the repository tree
- If a user or group has this permission, they can access the tree and see the tree branches allowed by default
- Access to the publication
- If a user or group has this permission, they can access the publication and see the sections allowed by default
- Repository manager
- If a user or group has this permission, they can access repository management and manage repository users, repository groups, assign and remove repository permissions, and edit repository details
User Management
If we have chosen User Management, we will get to the “List of Users” in the repository.
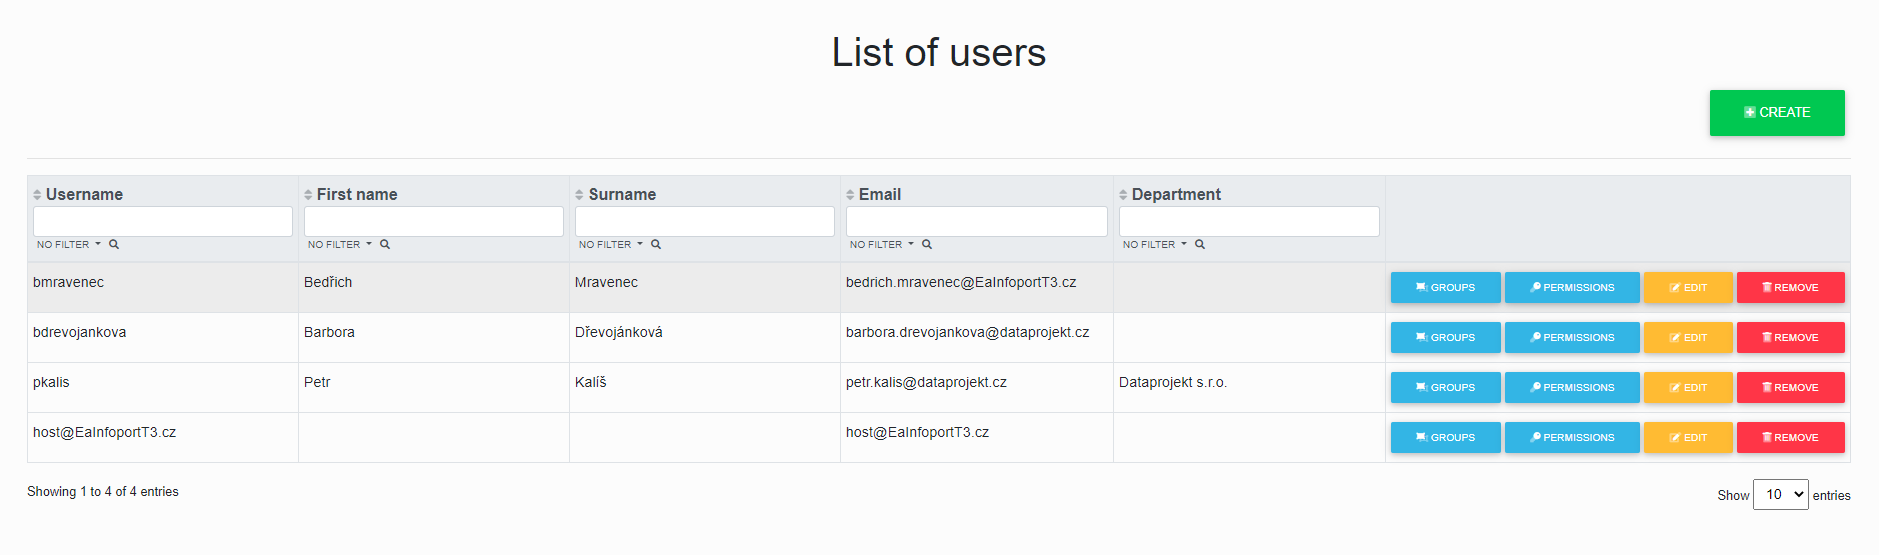
Here we can create new users, assign groups to existing users, assign permissions to existing users, edit existing users or remove existing users from the repository.
Creating a New User

We have chosen the green “Create” button in the List of Users.
The “Login name” and “Email” fields are required to create a user.
(Infoport in the background synchronises a user’s Infoport with the user’s EA according to the login name in Infoport and the login in EA.)
Password is required in order to sign in. Signing in without a password is permitted solely for users of Active Directory.
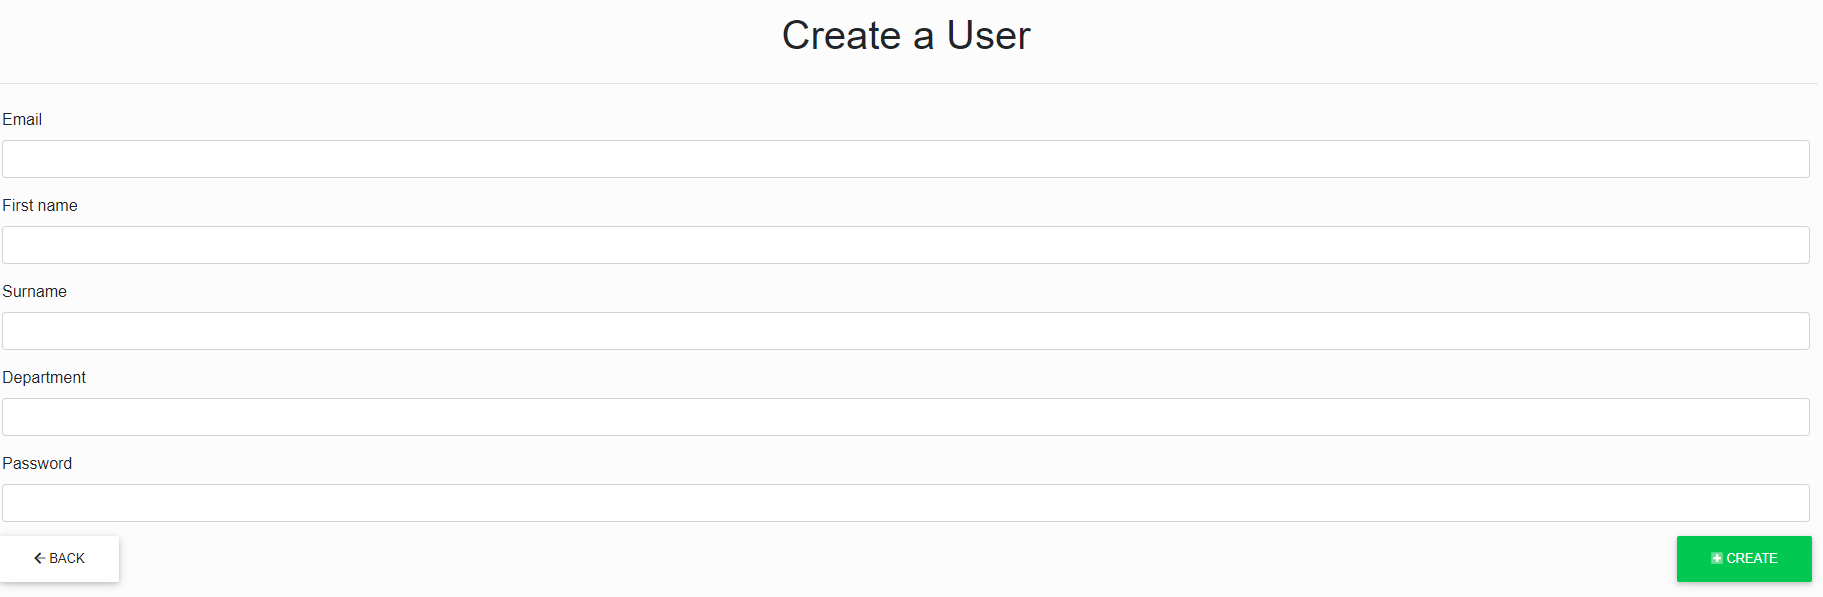
After correctly filling in and clicking on the “Create” button, we will get to the user “Edit”.
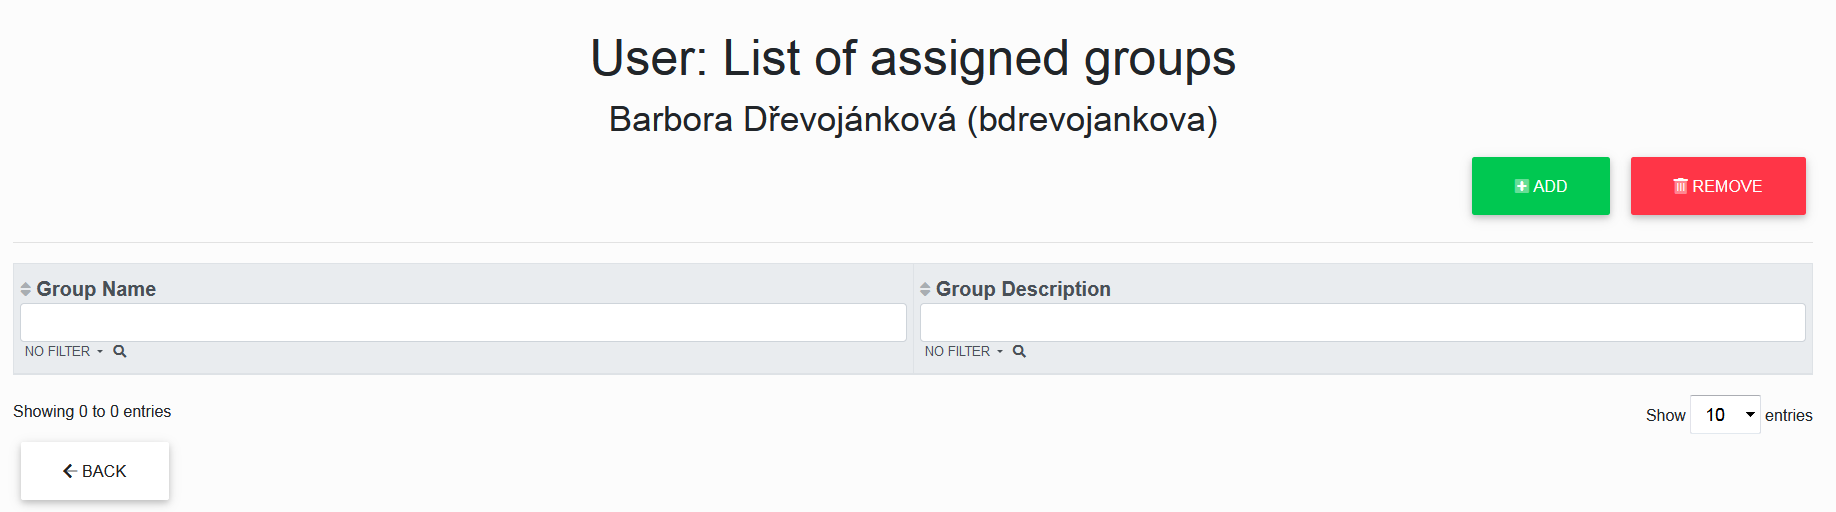
Assigning Groups to a User

We have chosen the blue "Groups" button.
We got to the List of Assigned Groups of a specific user for which the button was selected.
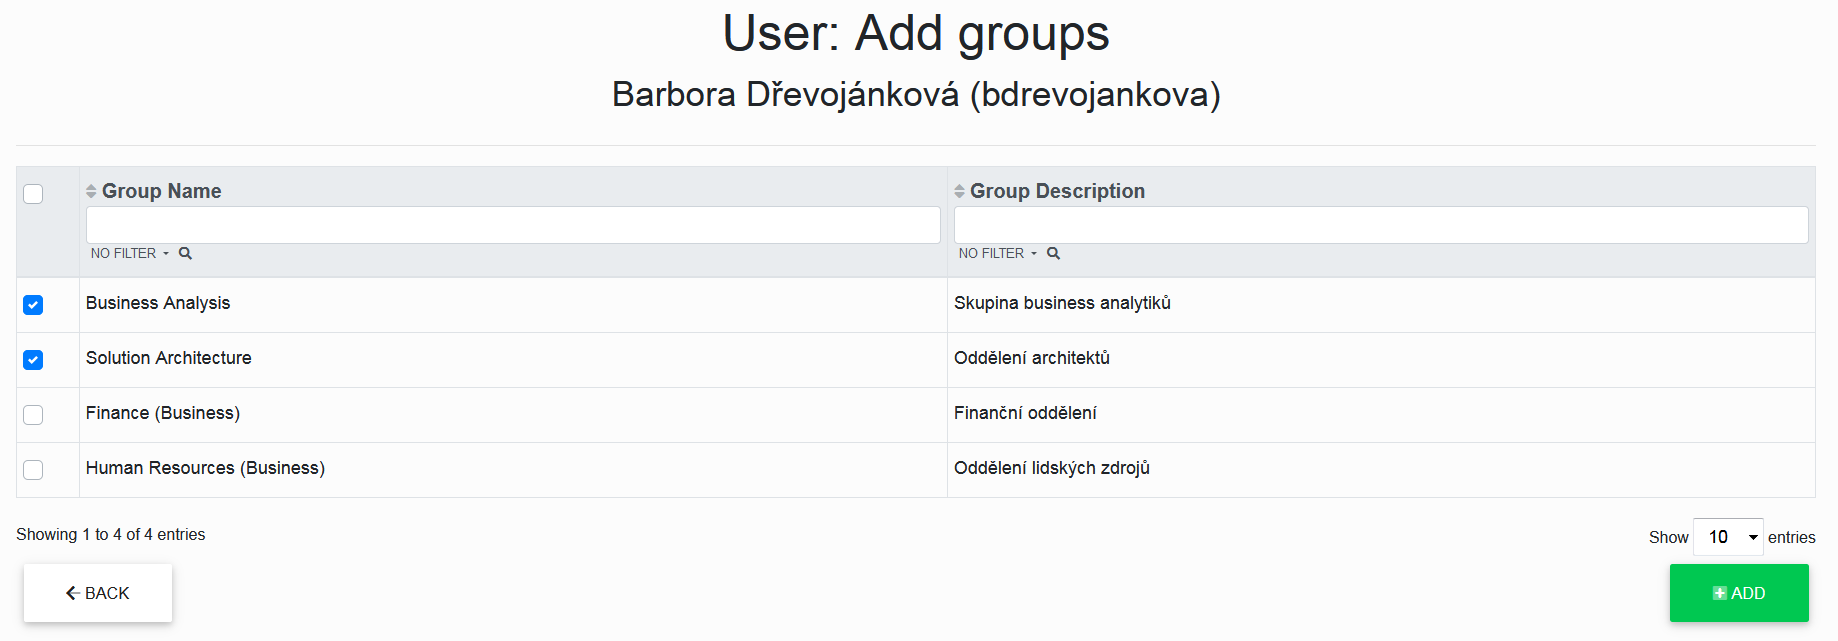
Here we can add users to different groups in the repository or remove users from different groups in the repository using the "Add" or "Remove" buttons and see an overview of which groups the selected user is in.
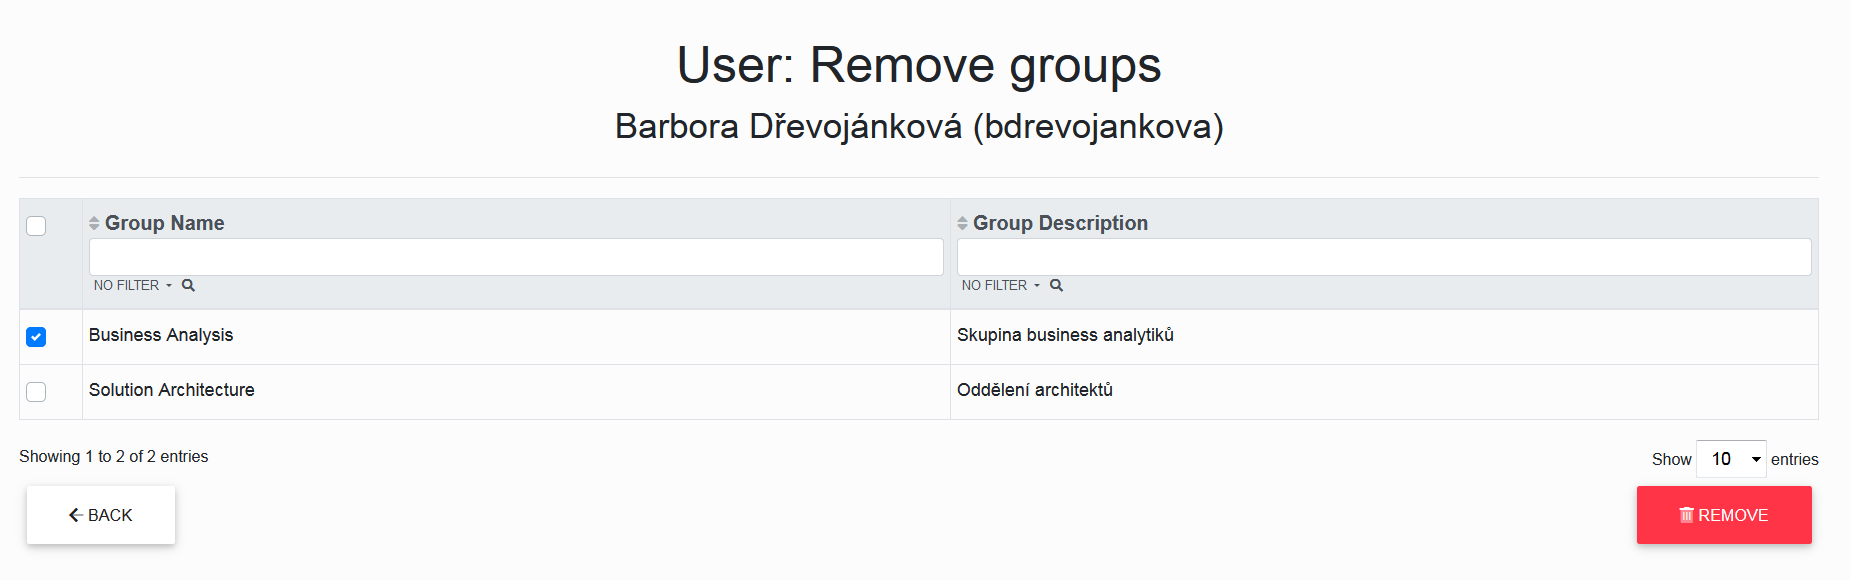
Remove
The “Remove” button opens a list of assigned groups where we can check the checkbox for each group we want to select, and after another click on the “Remove” button, the user will be sent to the checked groups.
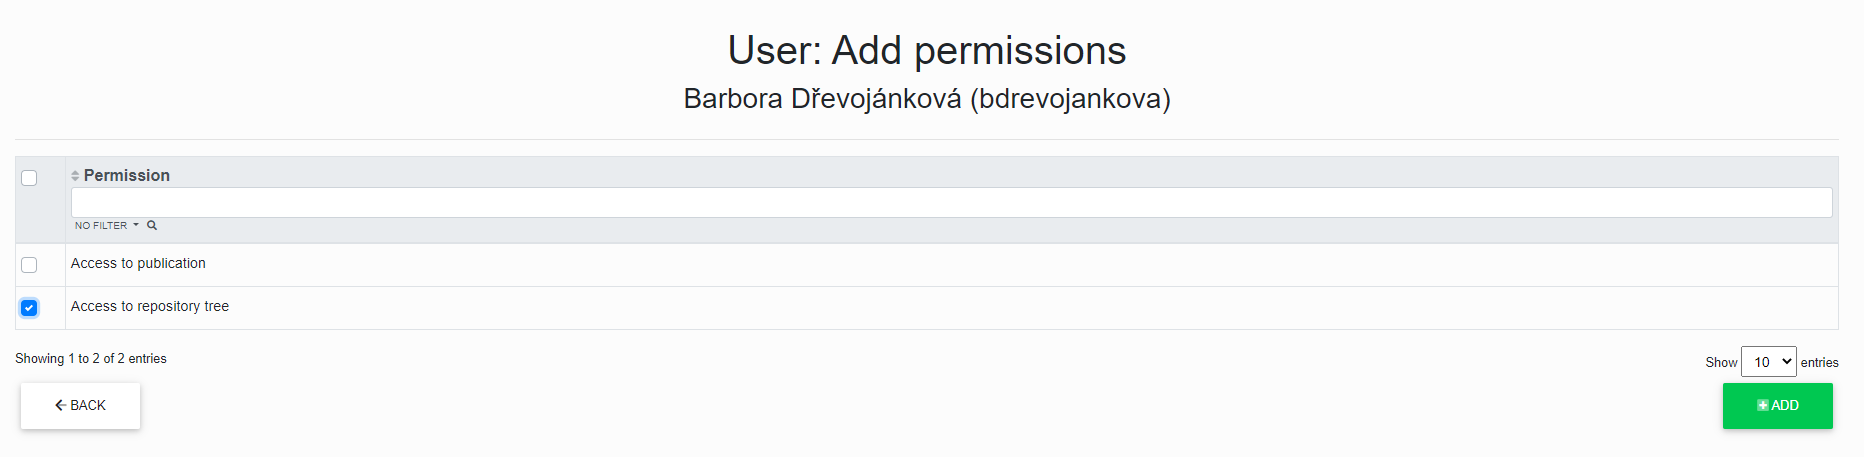
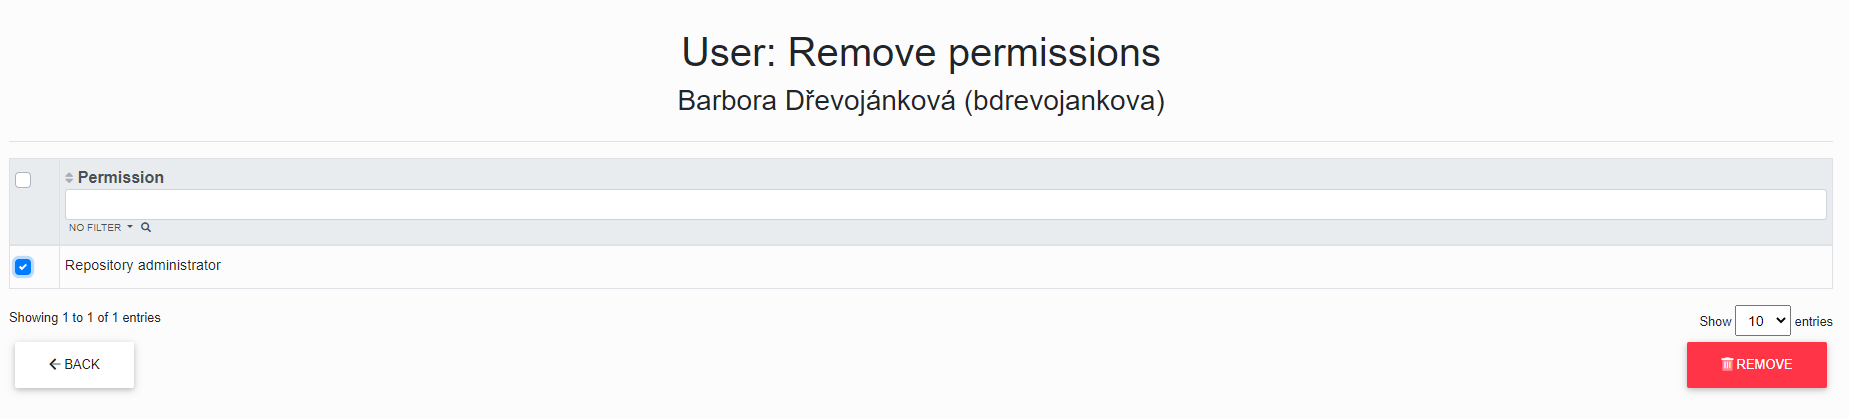
Assigning Permissions to a User

We have chosen the blue “Permissions” button.
Now we have the List of Assigned Permissions of a specific user for which the button was selected.
Here we can assign permissions to different users in the repository or remove permissions for different users in the repository using the “Add” or “Remove” buttons.
We can also see an overview of what permissions users own and whether they own it as their personal permission, or if they inherited it from the group in which they are assigned.
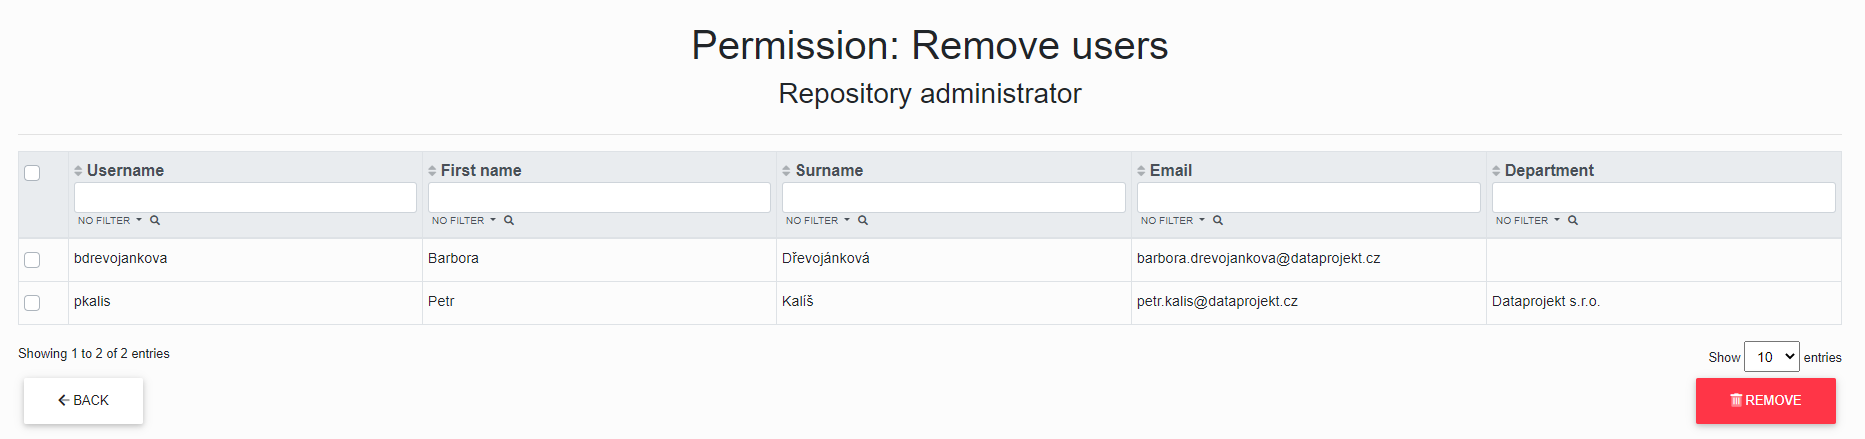
Remove
The “Remove” button has opened a list of assigned permissions where you can check the checkbox for each permission you want to select, and after another click on the “Remove” button, the permission for the selected user will be removed.

Edit a User

We have selected the yellow “Edit” button in the List of Users.
Now we can edit the selected user and also click through on “assign groups” to the user, “assign permissions” to the user and “remove a user” from the repository.
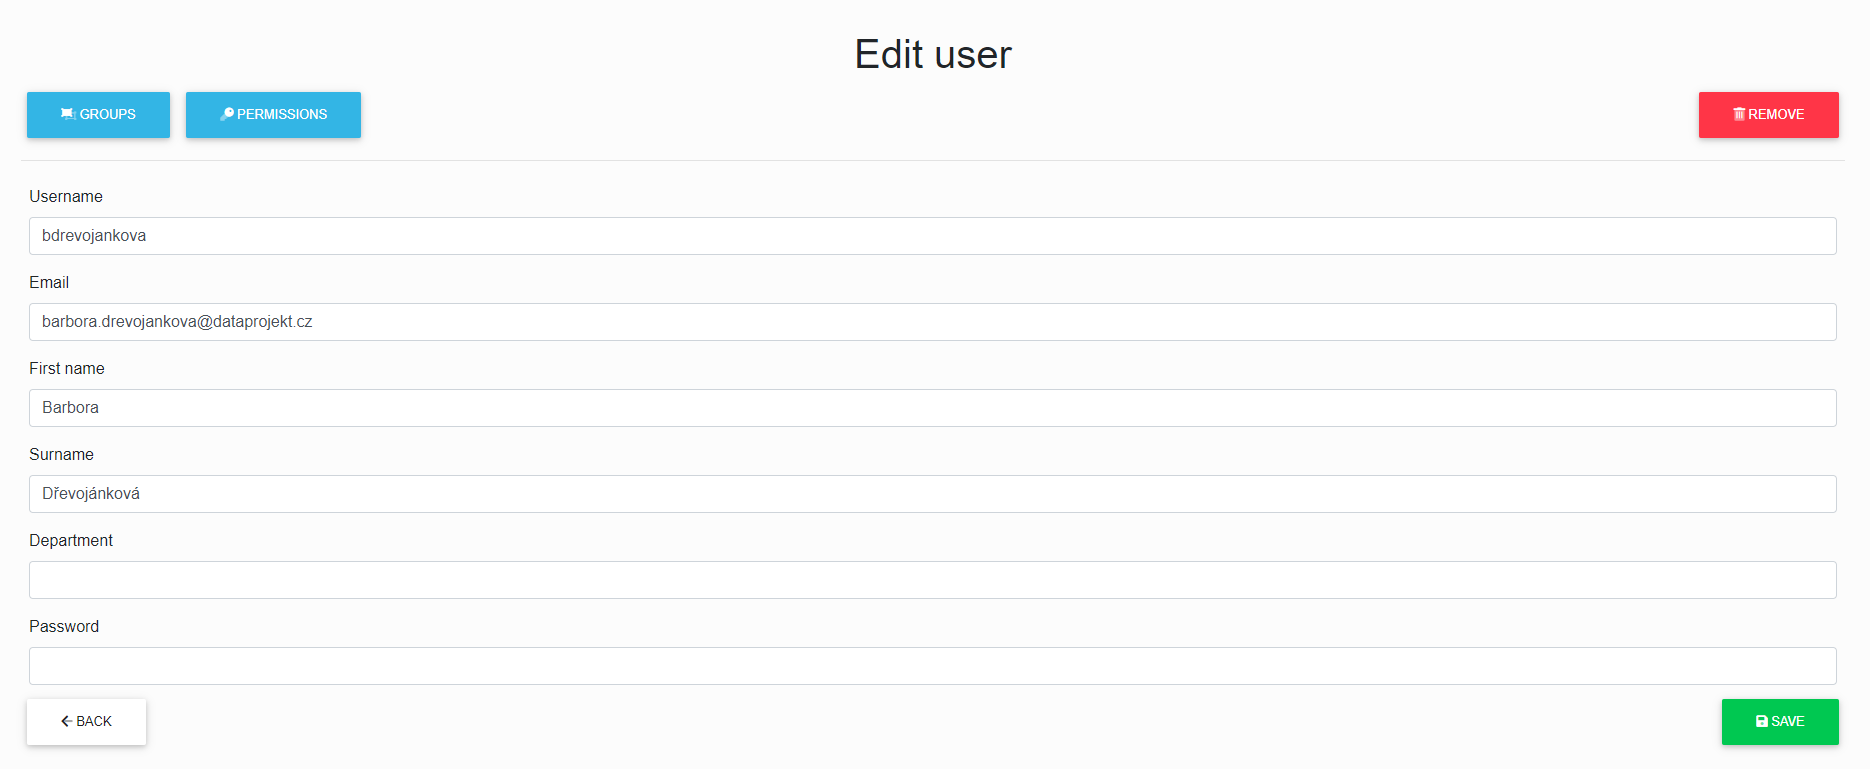
After correctly filling in and clicking on the “Save” button, the user data will be saved.
Remove a User

We have chosen the red “Remove” button, and now we can remove the selected user.
After another click on the “Remove” button, the user will be removed from the repository.
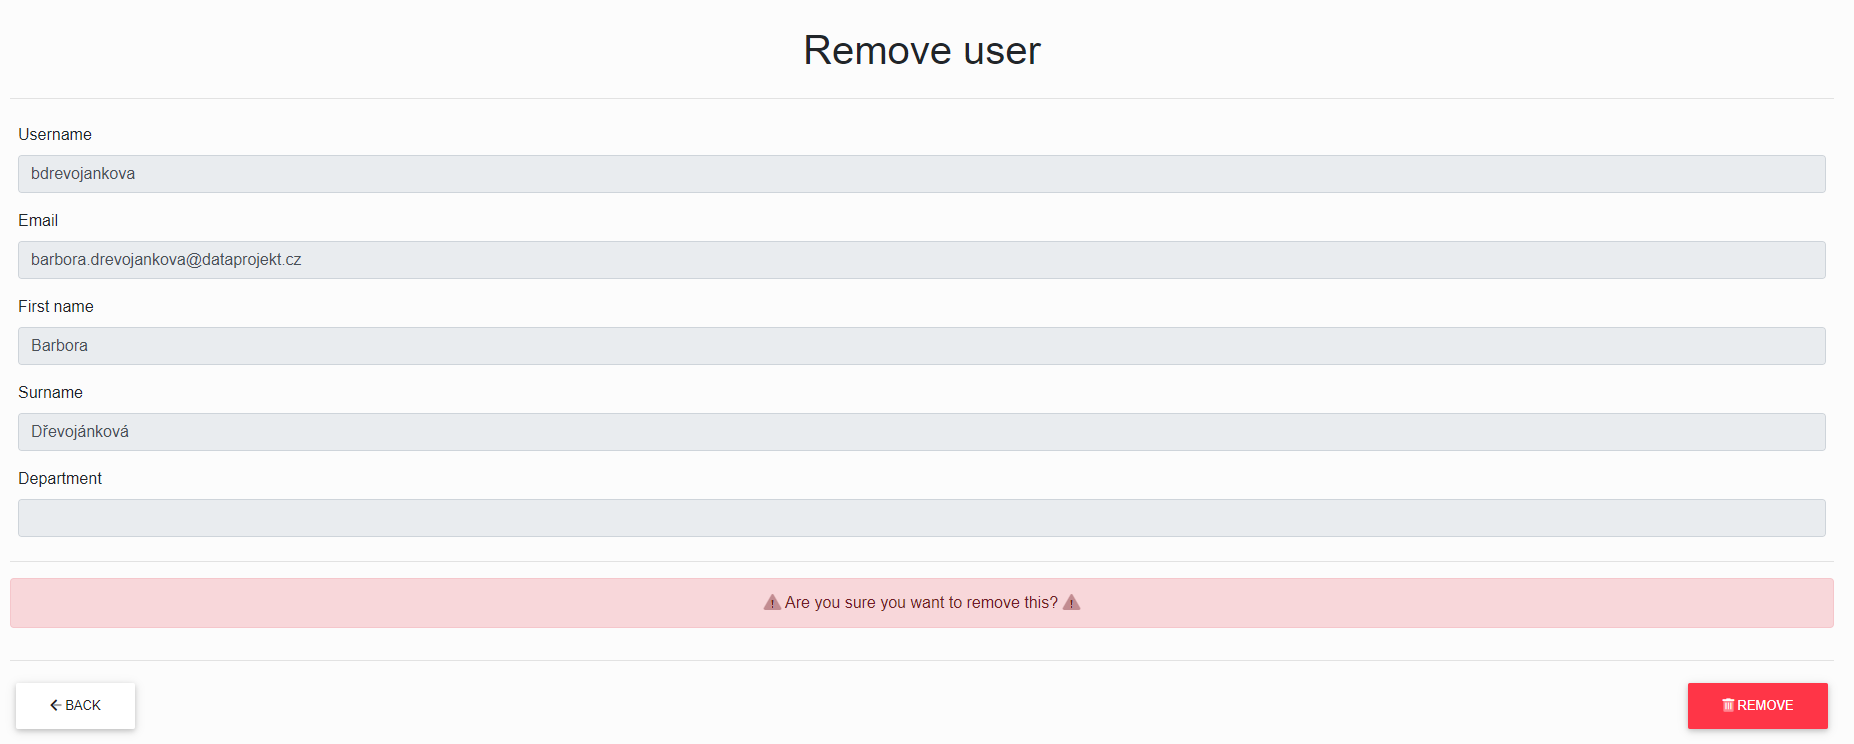
The user will still exist in Infoport. To renew it, just create a user with the same name and e-mail.
Group Management
If we have chosen the group management, we will get to the “List of Groups” in the repository.
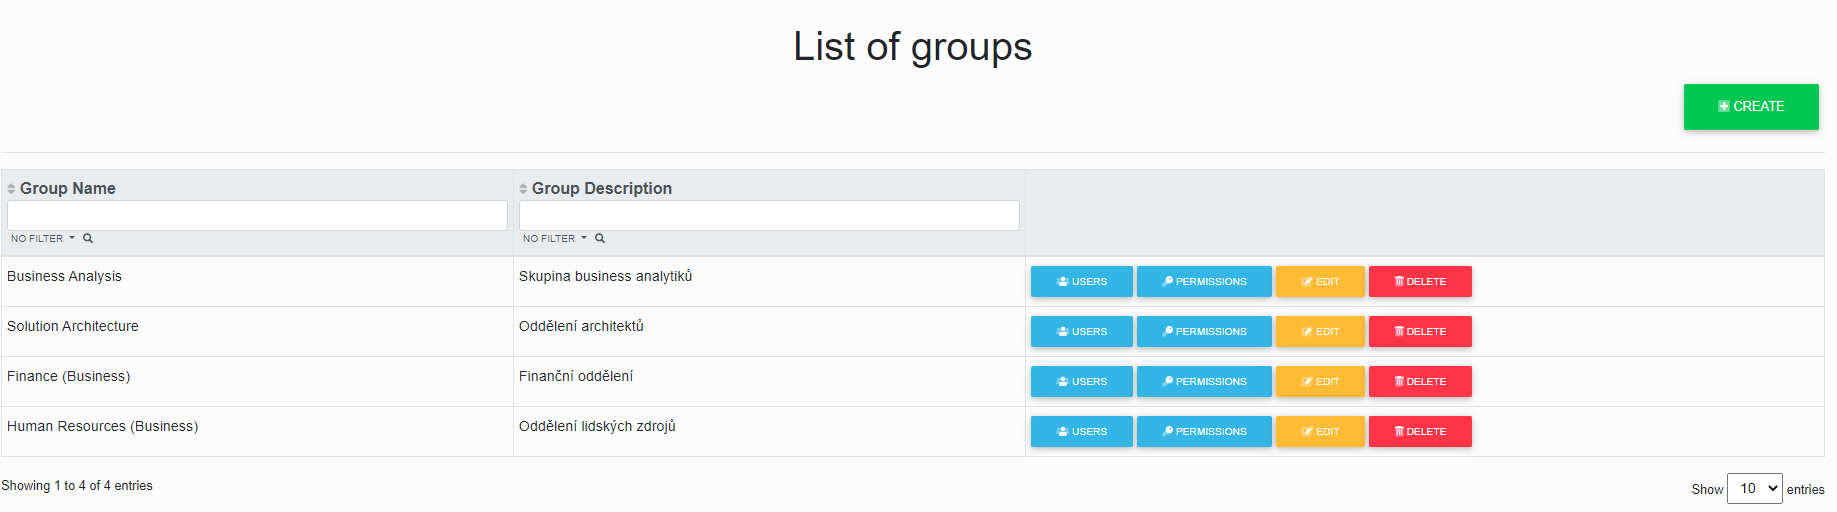
Here we can create new groups, assign users to existing groups, assign permissions to existing groups, edit existing groups or delete groups from the repository.
Creating a New Group
We have chosen the green “Create” button in the list of groups, and now we can create a new group.
The “Group Name” field is required during creation.

After correctly filling in and clicking on the “Create” button, we will get to the group editing.
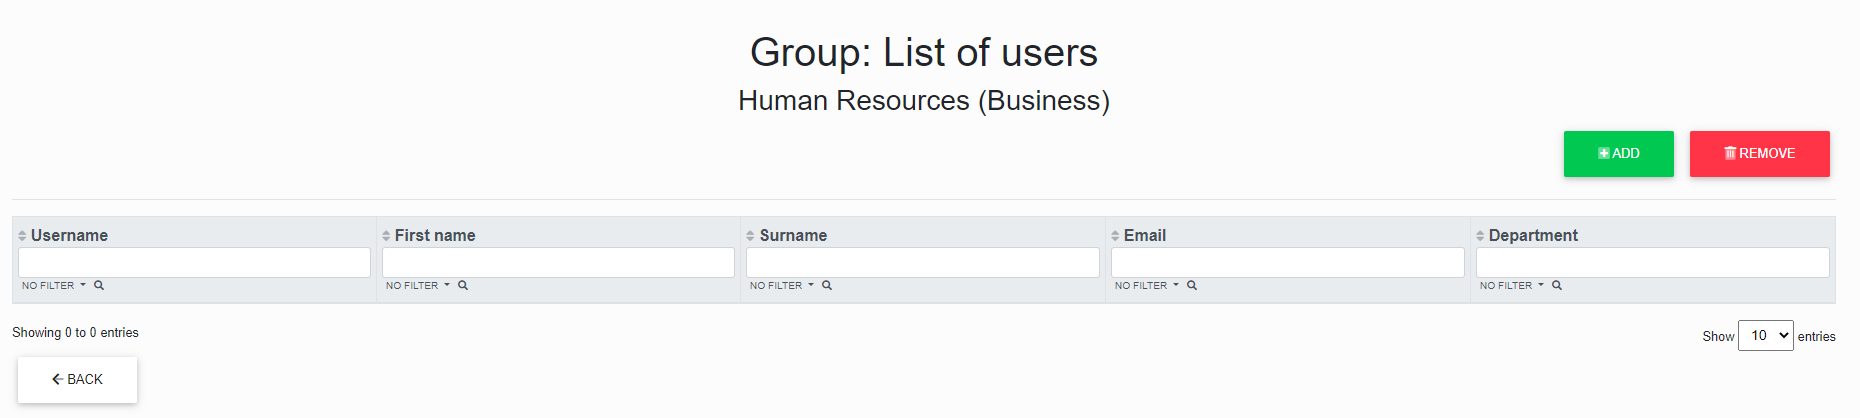
Assigning Users to a Group

We have chosen the blue “Users” button.
Now we have the List of Assigned Users of a specific group for which the button was selected.
Here we can add users in the repository to the selected group in the repository or remove users in the repository from the selected group using the “Add” or “Remove” buttons and see an overview of users in the selected group.
Add
The “Add” button has opened a list of unassigned users where we can check the checkbox for each user we want to select, and after another click on the “Add” button, the checked users will be assigned to the group.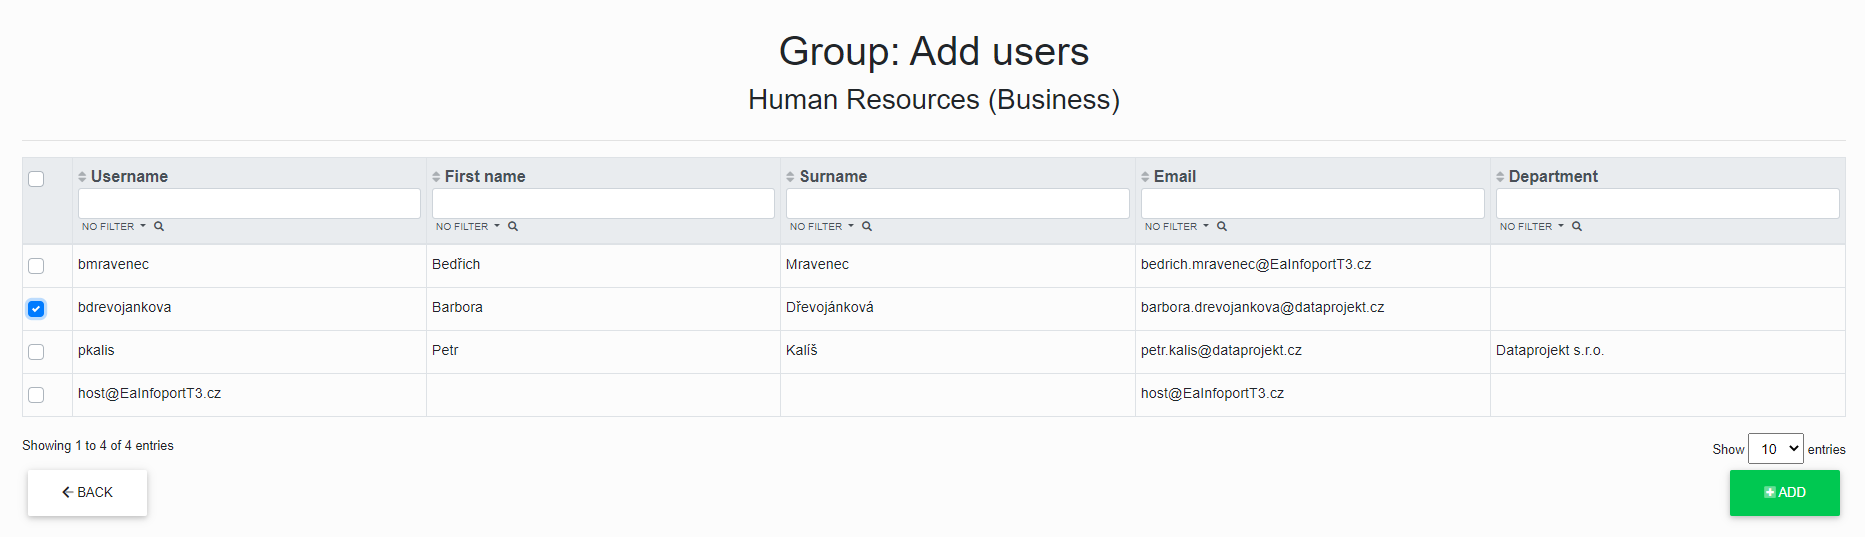
Remove
The “Remove” button has opened a list of assigned users where we can check the checkbox for each user we want to select, and after the next click on the “Remove” button, the checked users will be removed from the group.
Assigning Permissions to a Group
We have chosen the blue “Permissions” button.
Now we have the List of assigned permissions of a certain group for which the button was selected.
Here we can assign permissions to different groups in the repository or remove permissions to different groups in the repository using the “Add” or “Remove” buttons and see an overview of what permissions the group owns.

Remove
The “Remove” button has opened a list of assigned permissions where we can check the checkbox for each permission we want to select, and after another click on the “Remove” button, the permissions of the selected group will be removed.
Edit a Group
We have selected the yellow “Edit” button in the List of Users.
Now we can edit the selected group and also click through on “assign users” to the group, “assign permissions” to the group and “delete a group” from the repository.
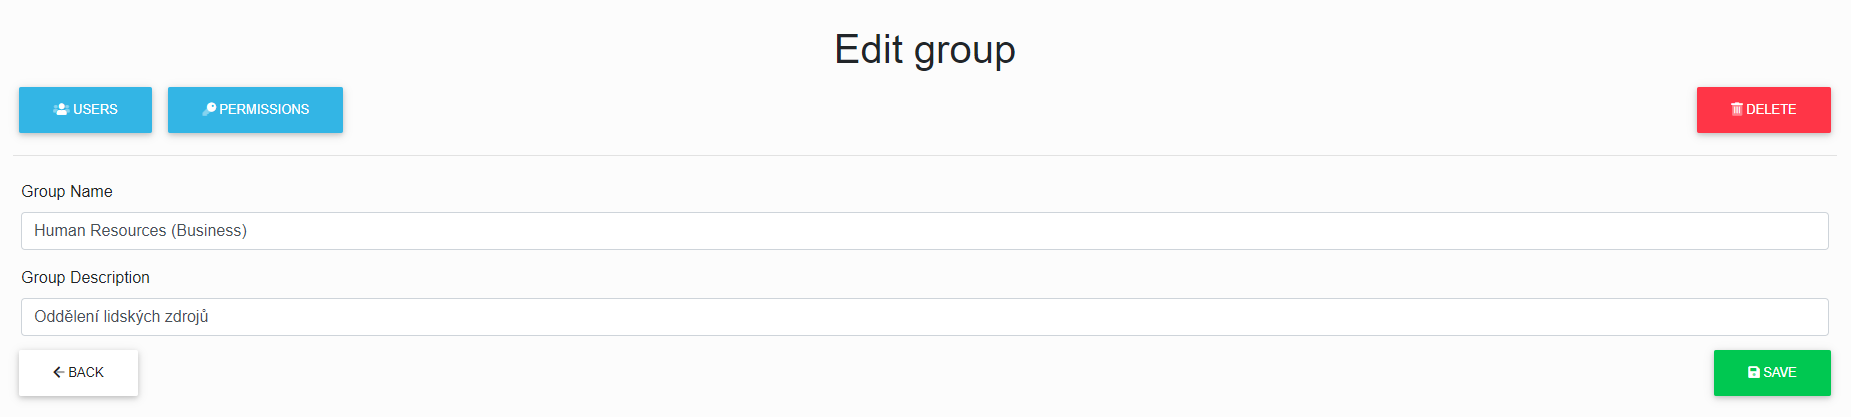
After correctly filling in and clicking on the save button, the group data will be saved.
Delete a Group

We have chosen the red “Delete” button, and now we can delete the selected group.
After another click on the “Delete” button, the group will be deleted from the repository.
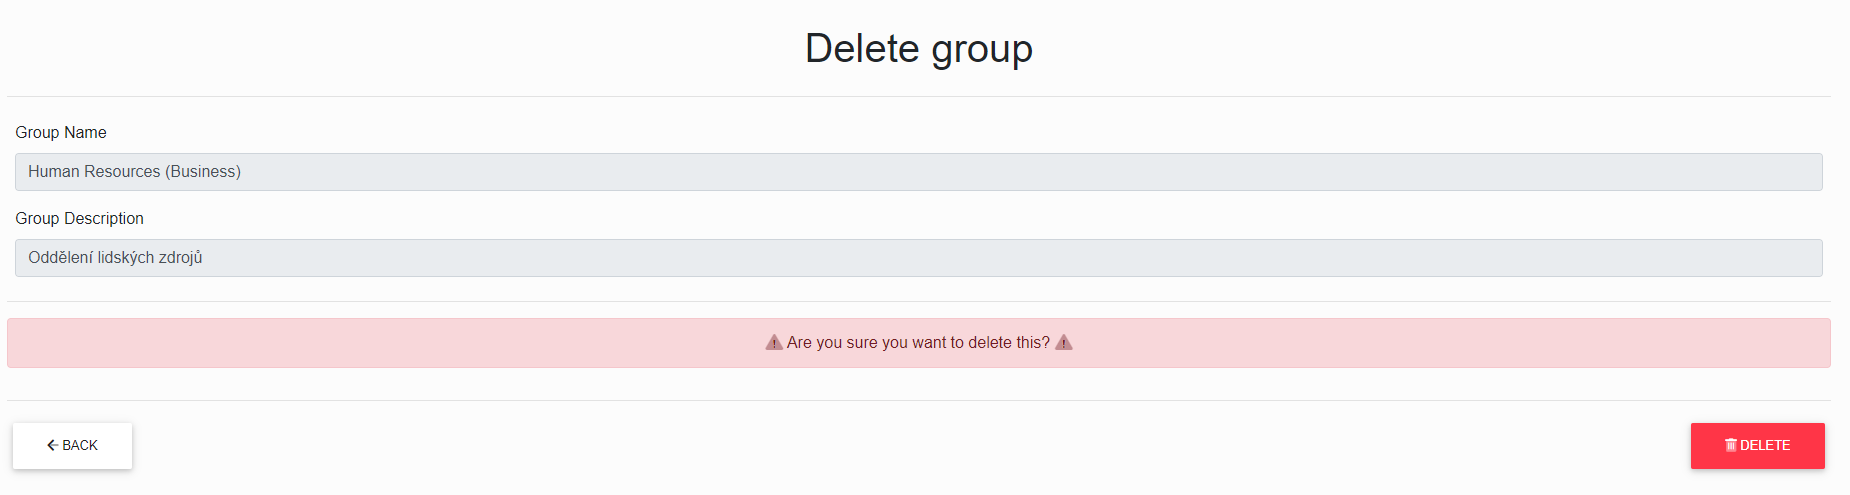
Deleting a group is irreversible. The users in the group remain in the repository, but all permissions they have gained from the group are removed.
Permission Management
If “Permission Management” is selected, we will get to the List of permissions in the repository.
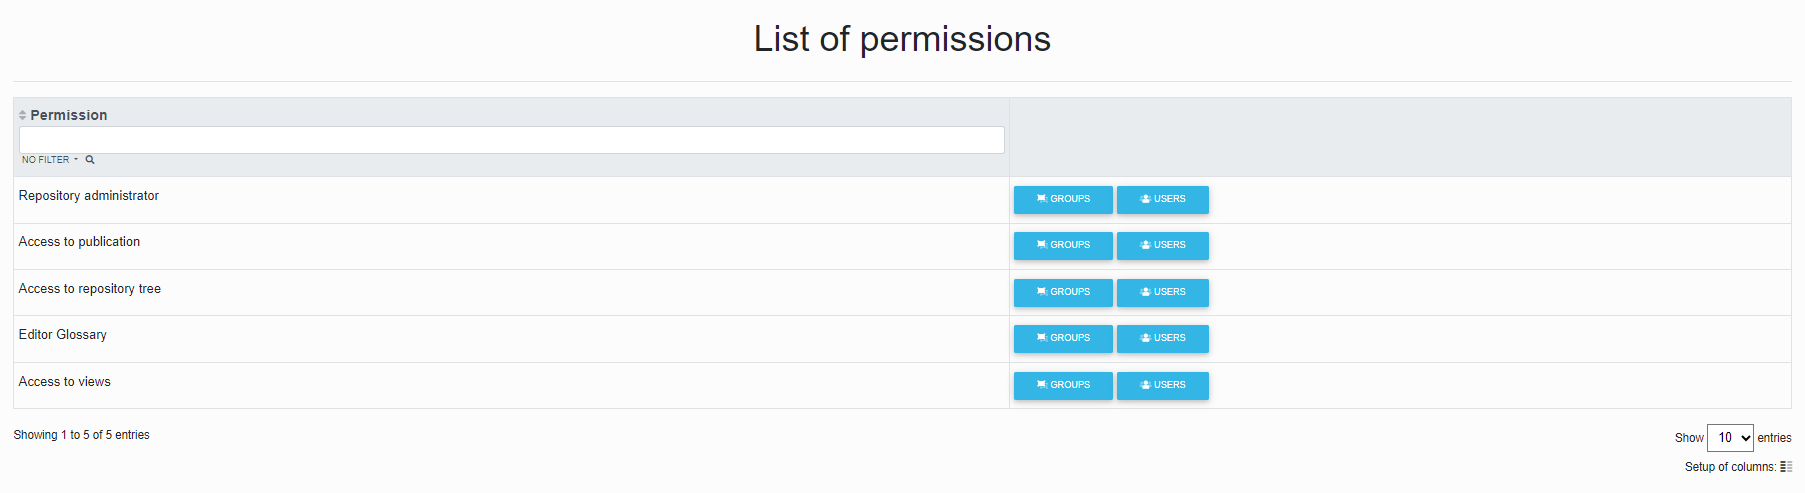
Here we can assign permissions to groups and users in the repository.
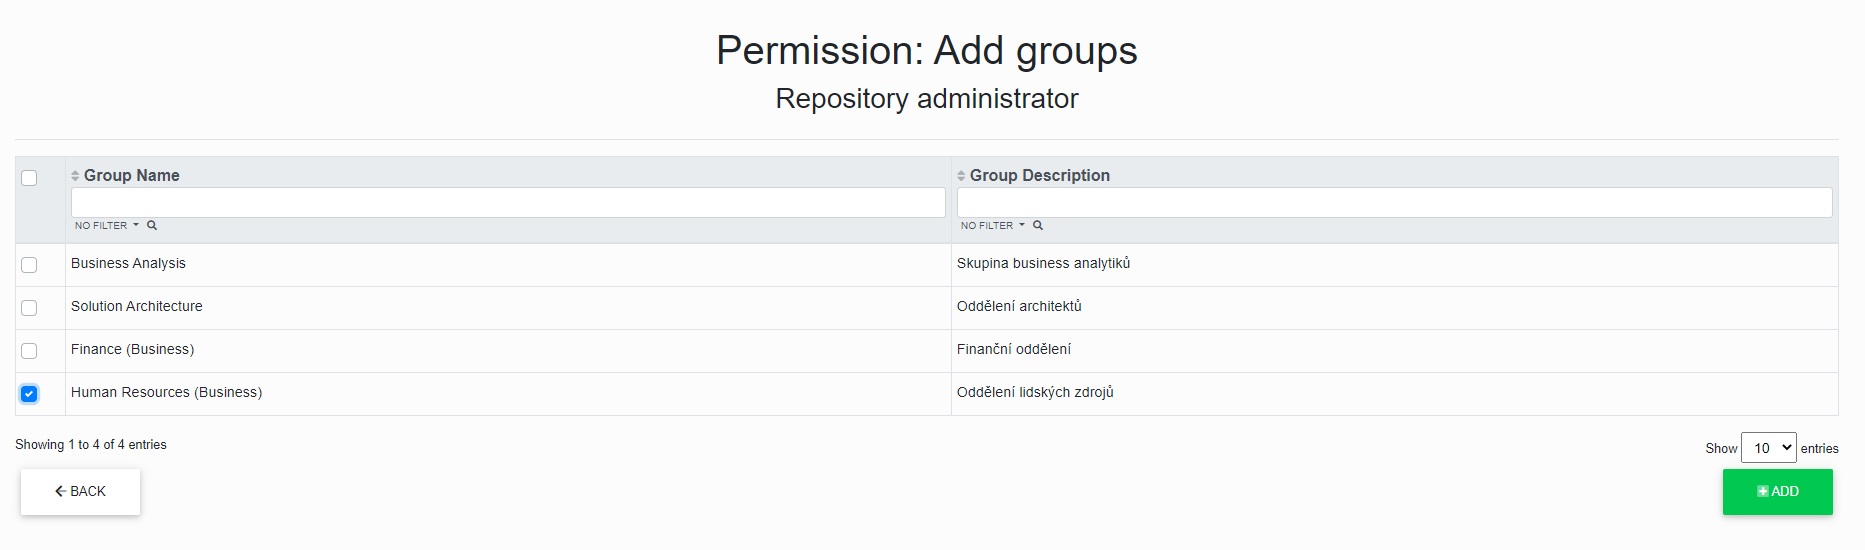
Assigning Permissions to Groups
We have chosen the blue “Groups” button.
Now we have the List of groups to which a certain permission is assigned and for which the button was selected.
Here we can assign permissions to different groups in the repository or remove permissions to different groups in the repository using the “Add” or “Remove” buttons and see an overview of the groups that own the selected permission.
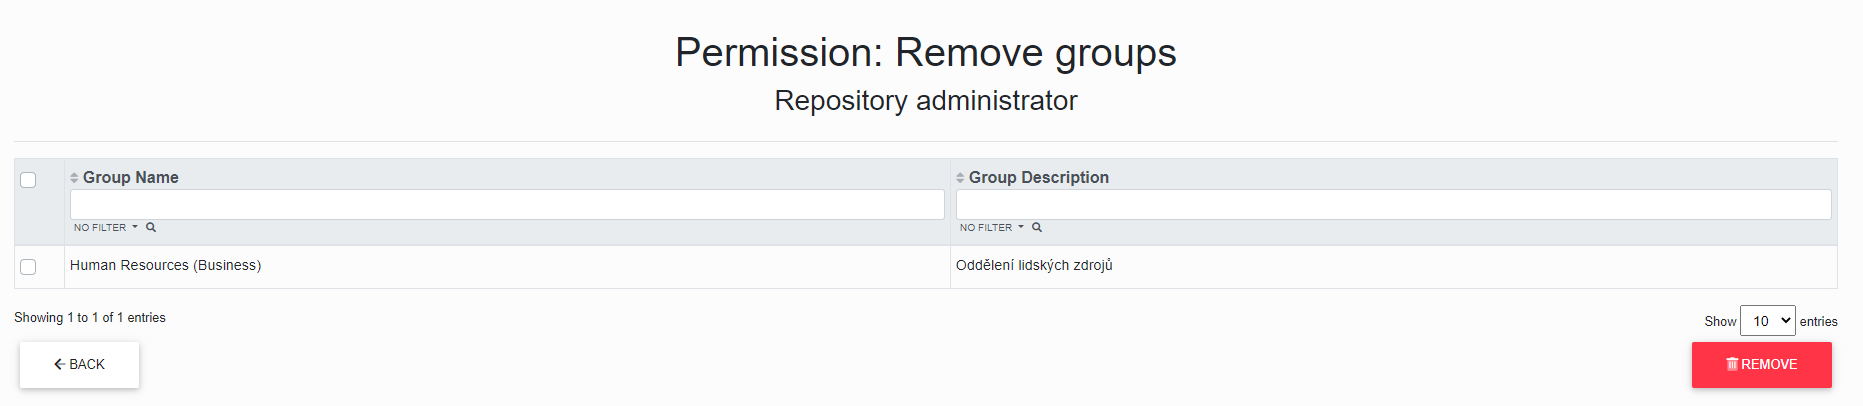
Remove
The “Remove” button has opened a list of assigned groups where we can check the checkbox for each group we want to select, and after another click on the “Remove” button, the user will be removed to the checked groups.
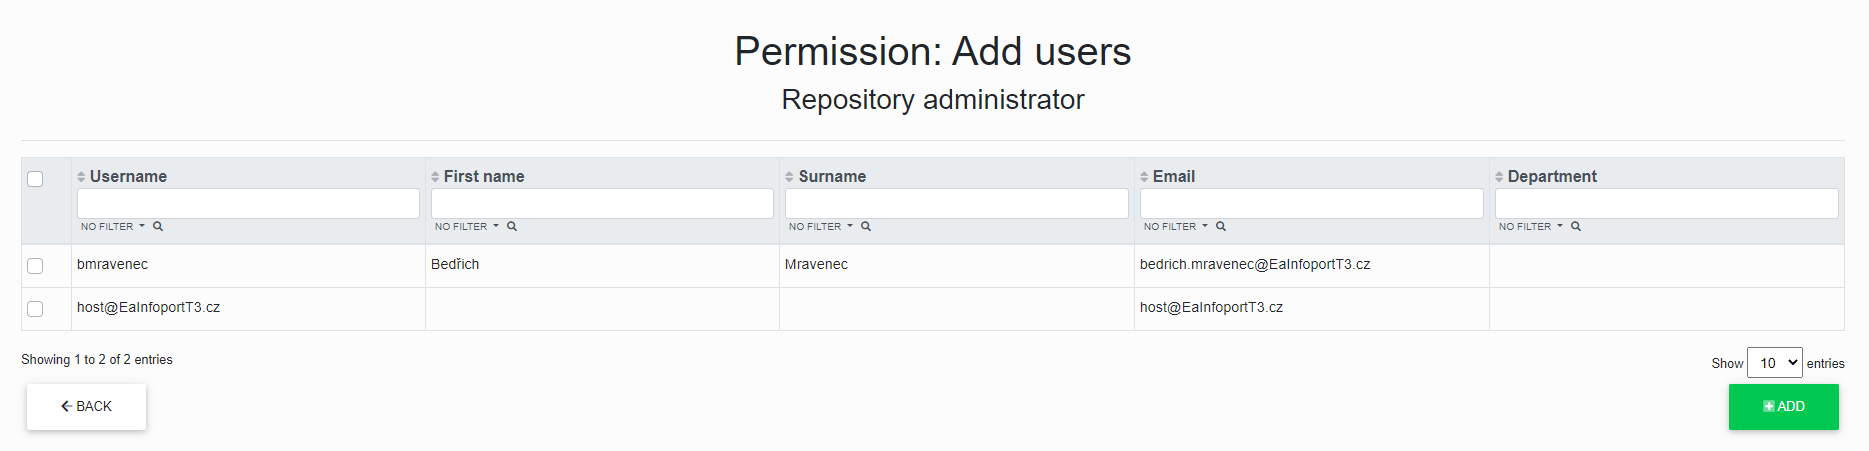
Assigning Permissions to Users
We have chosen the blue “Users” button.
Now we have the List of users to whom a certain permission is assigned and for which the button was selected.
Here we can assigned permissions to different users in the repository or remove permissions for different users in the repository using the “Add” or “Remove” buttons and see an overview of users who own the selected permission.
Add
The “Add” button has opened a list of unassigned users where we can check the checkbox for each user we want to select, and after another click on the “Add” button, permission will be assigned to the selected users.
Remove
The “Remove” button has opened a list of assigned users where we can check the checkbox for each user we want to select, and after another click on the “Remove” button, the permission will be removed from the selected users.
Repository Detail
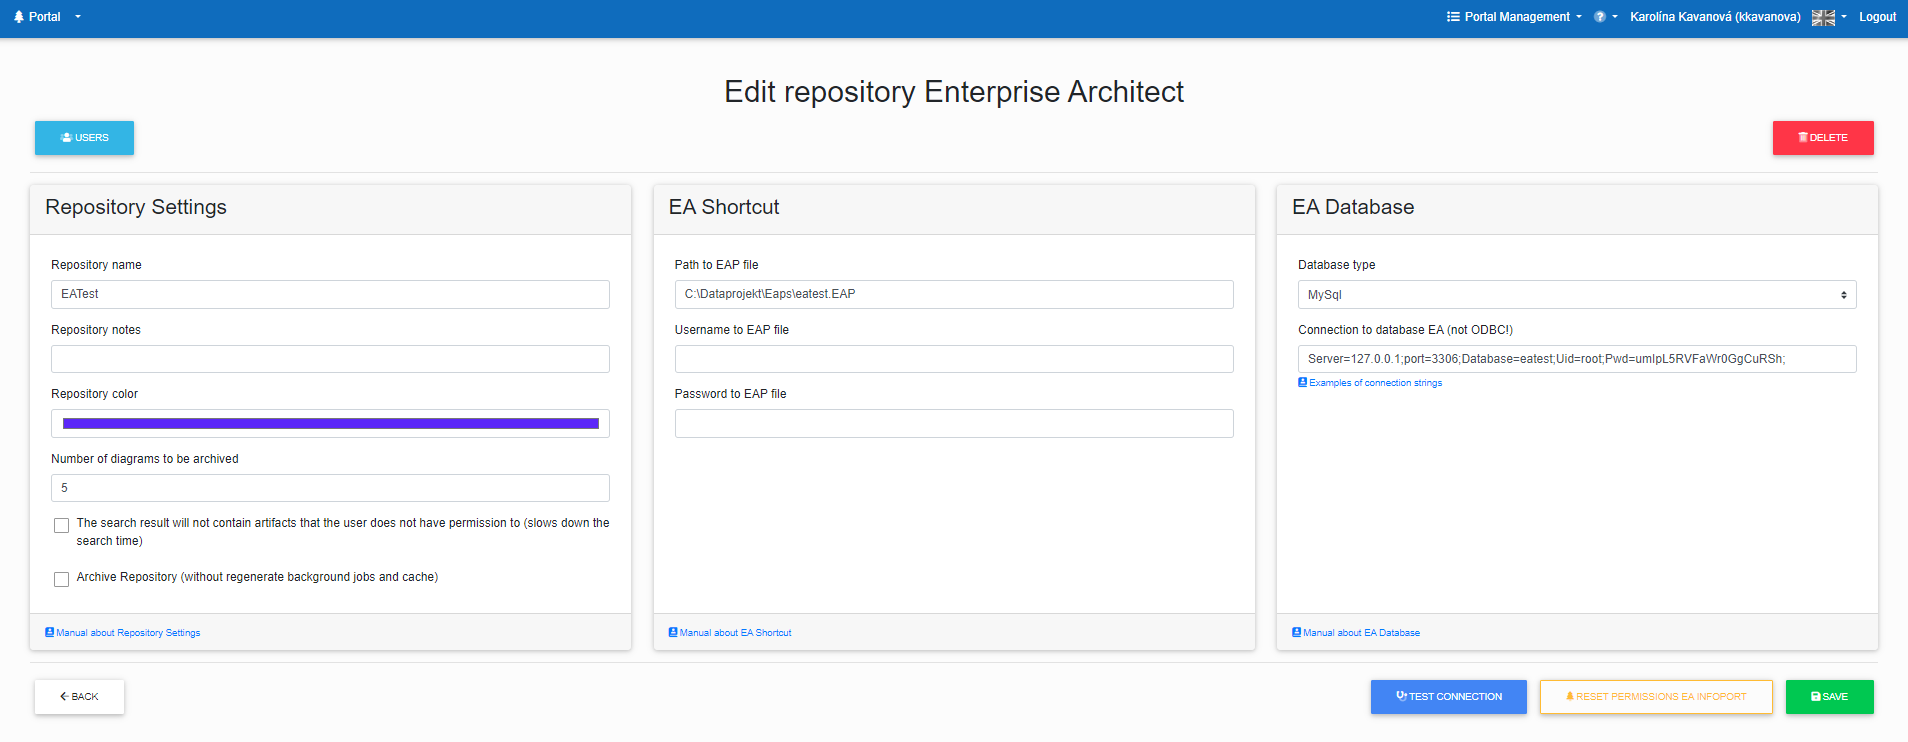
If we have selected “repository detail”, we can edit the repository.
We can change its name, description and colour.
These changes are mostly important if you use the “Multiple Repositories” function or as an Infoport manager.
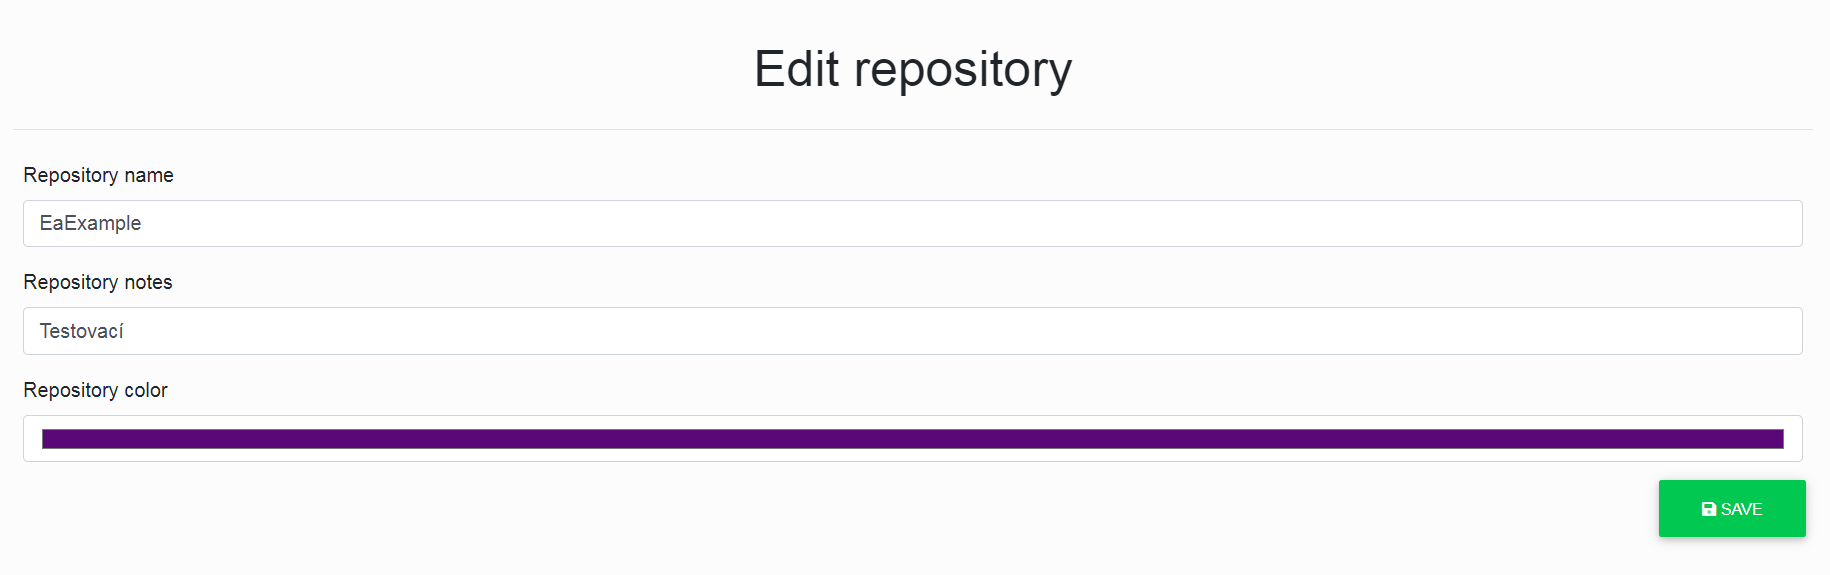
After clicking the "Save" button, the changes will be saved.
Overview of notification subscriptions
The administrator must set up an e-mail server in Configuration Manager to send notification e-mails to users.
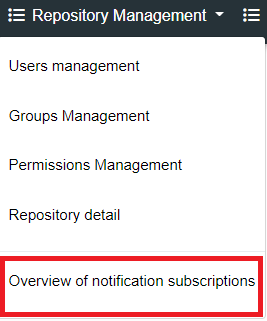
If the notification system is set up, the repository administrator can see all the notifications set up in the repository.
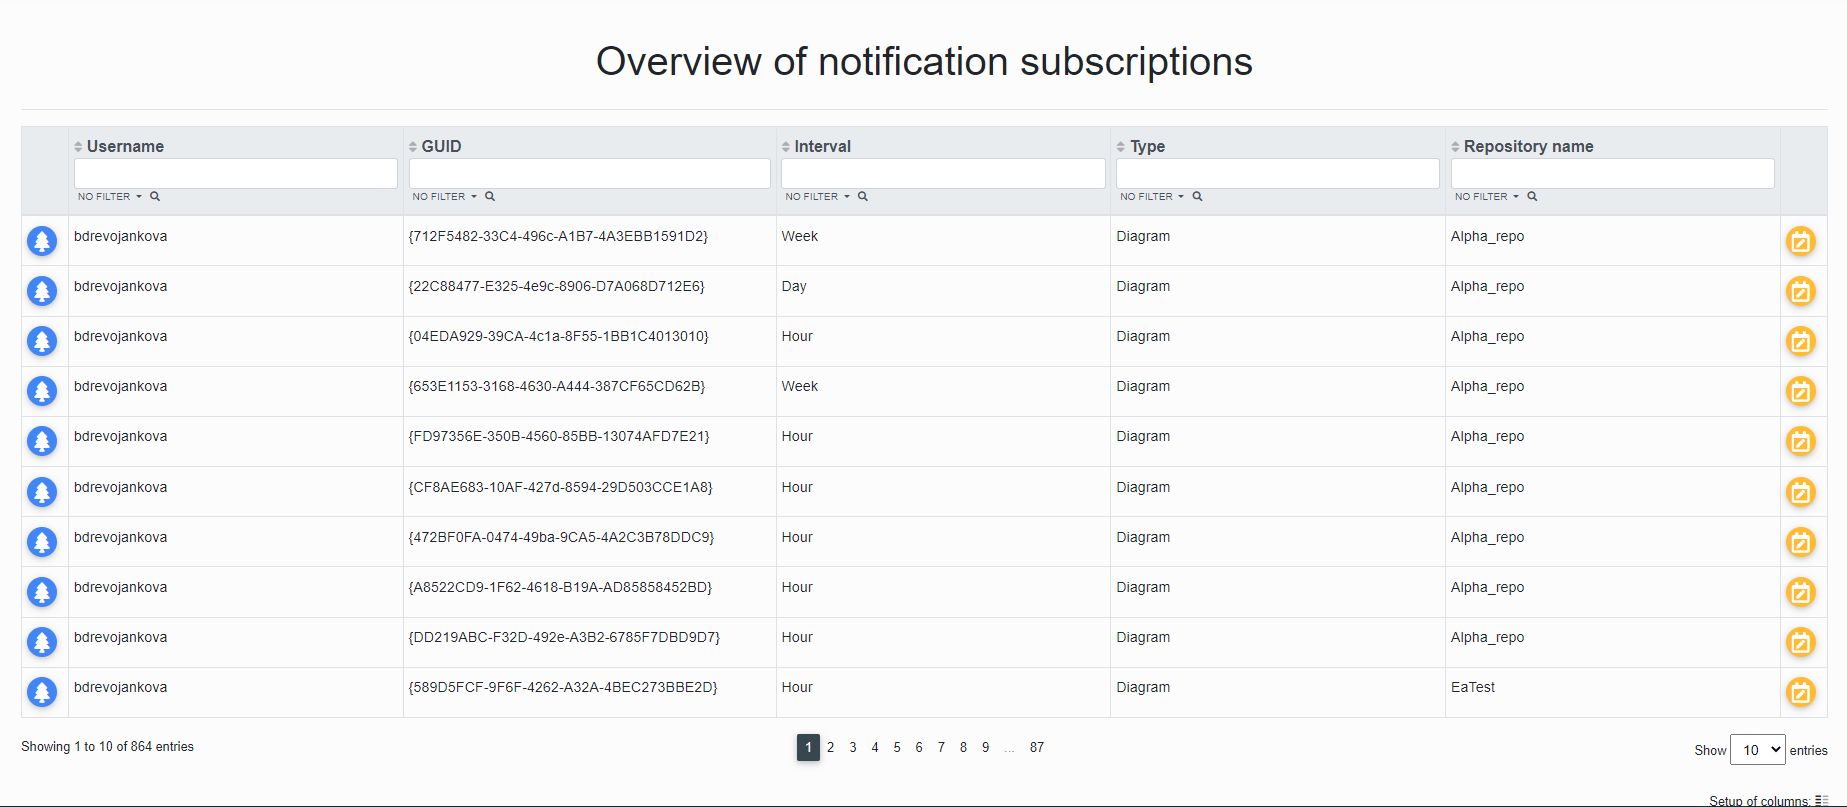
The repository administrator can click on the "Tree" icon or the "ChangeNotificationType" button.
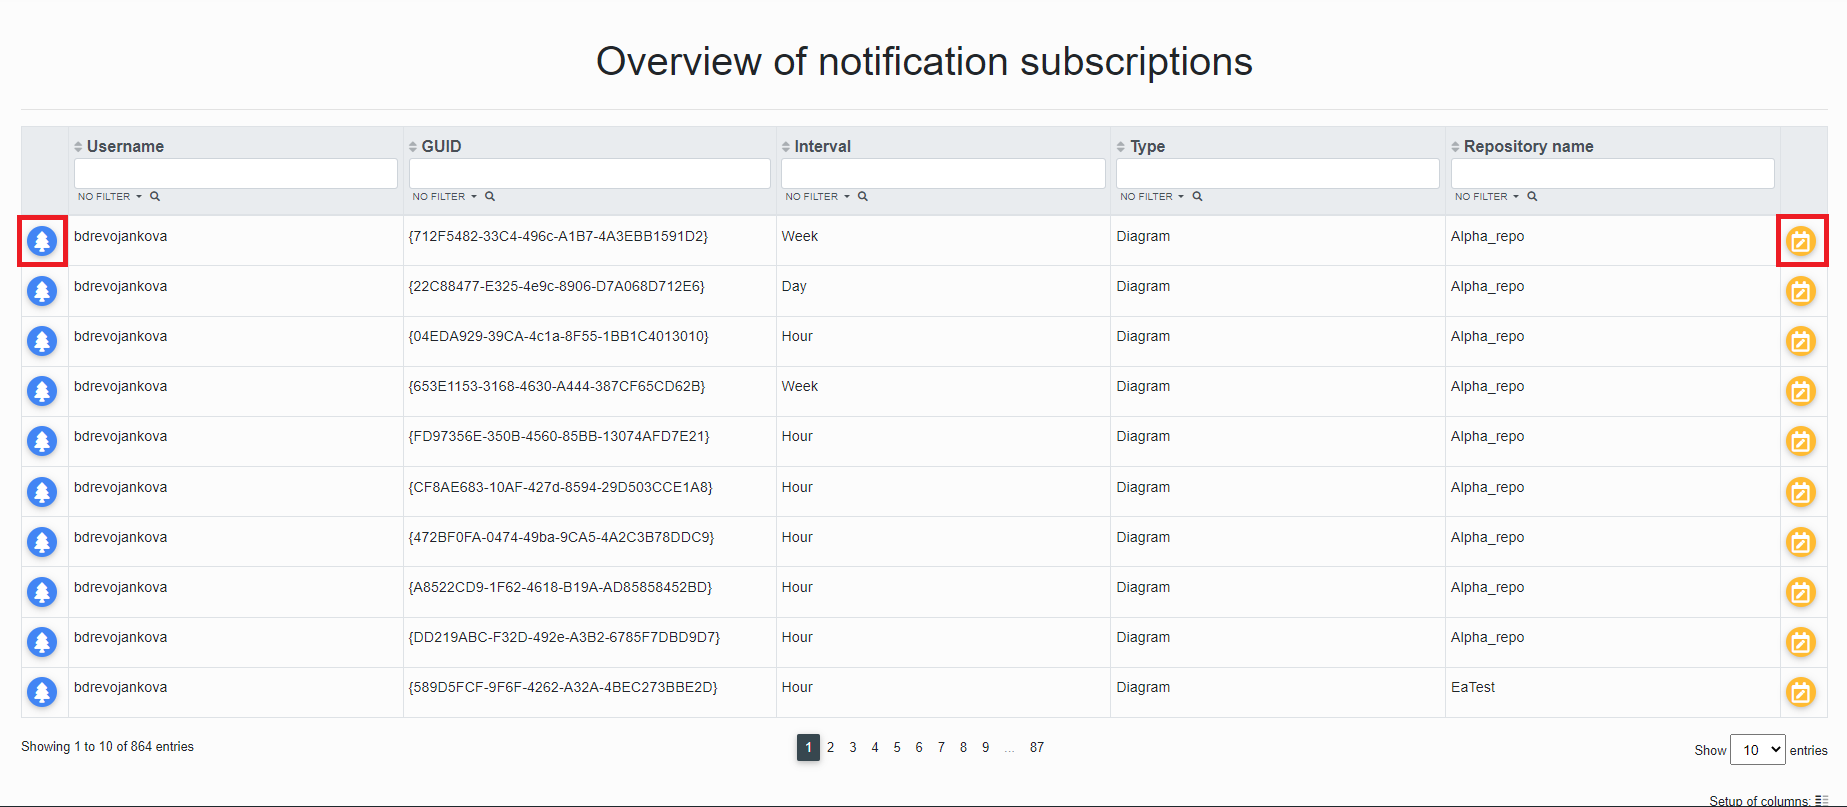
After clicking on the "ChangeNotificationType" button, the repository administrator is redirected to the "Setting the notification interval for diagram subscribers" page where he can check the Name, Type, Login and Email to which the notification is sent.
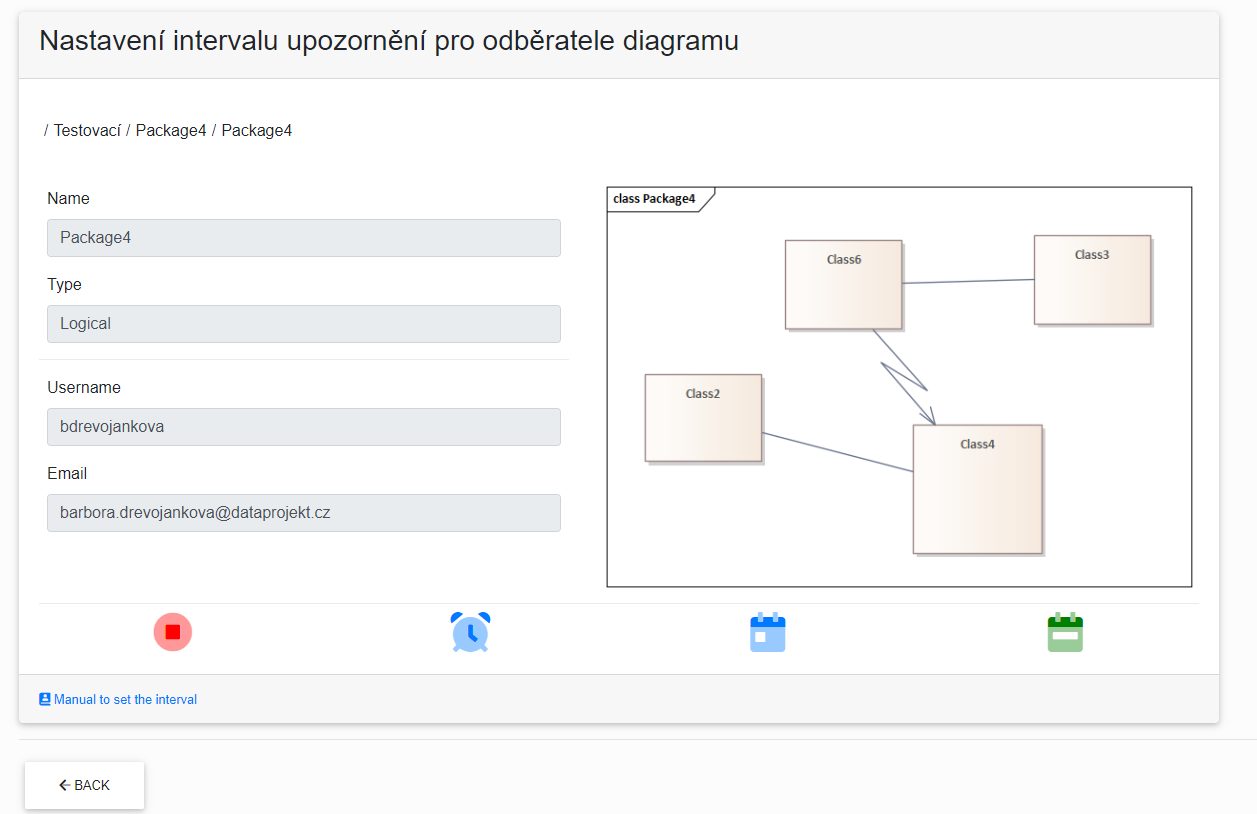
There are three notification services that notify users of changes to the diagram.
By hovering the cursor over the icons, the user can read what type of notification it is.

You can easily change the notification type either on this page, where you just click the blue icon, or go to the diagram on the repository.

The green colour of the icon informs which notification type is on.
If the user wants to cancel the notification, just click the red icon.
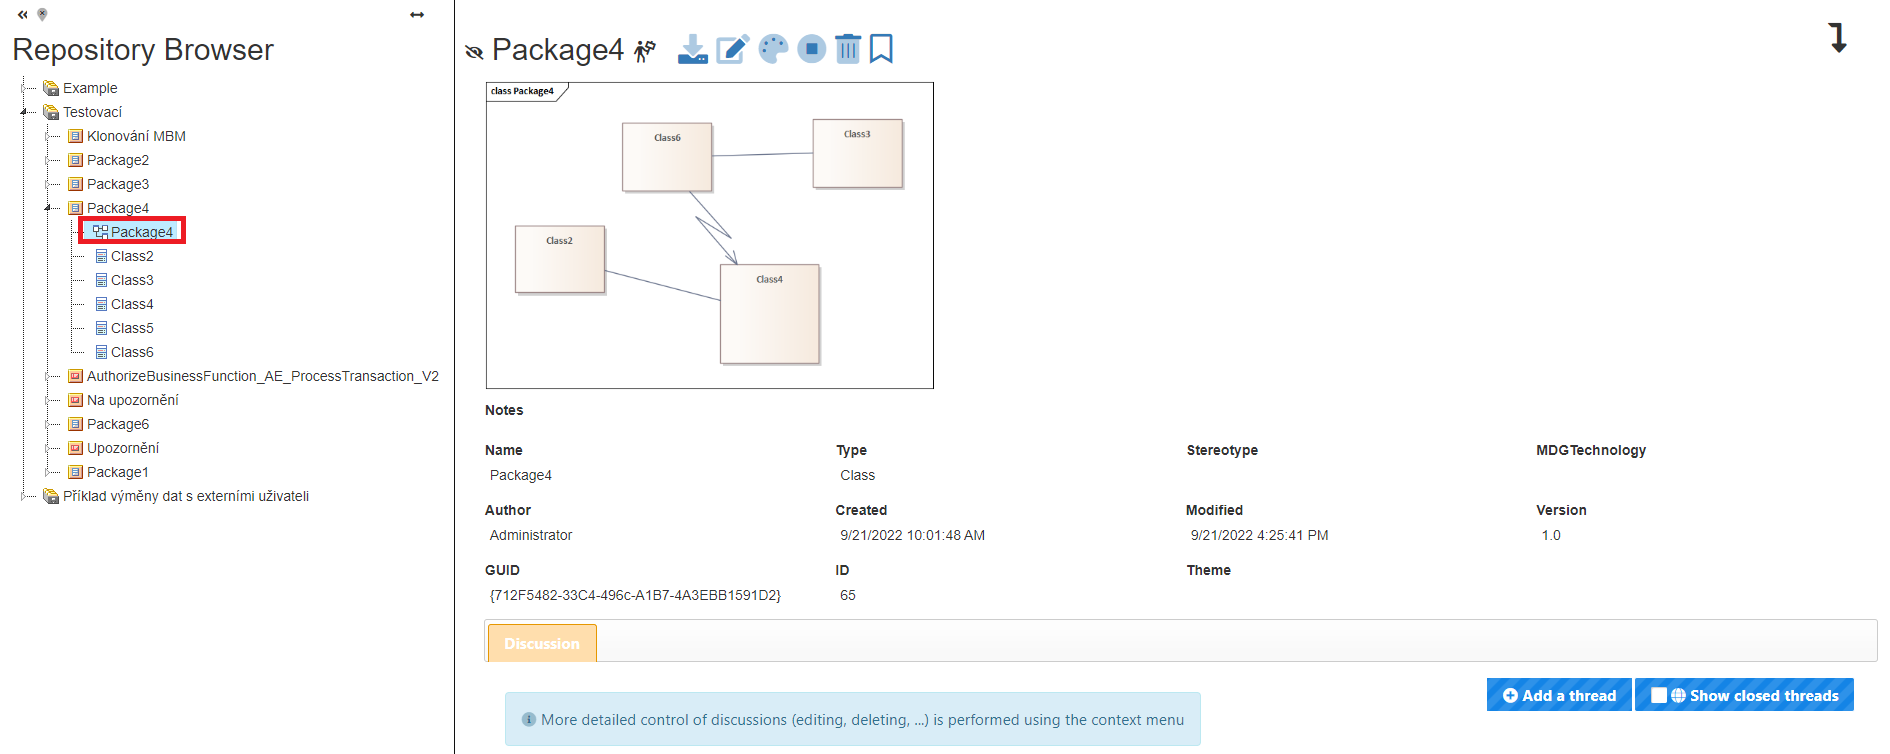
When the user clicks on the "Tree"  icon, he is redirected to the repository of the diagram.
Archive repository
Archive repository (without background jobs for regeneration and chache)
In the repository editor, it is possible to set the "Archive repository (without background jobs for regeneration and chache)" mark. The functionality will ensure that the system does not unnecessarily run background jobs and chache regeneration.
You can edit a repository > Portal Management > Repositories Management > Edit a specific repository.
Repository password encryption
EA Infoport now offers the ability to encrypt passwords in the repository.
Settings:
1) Configuration Manager >Encryption Key > generate Encryption Key > save setup > restart EA Infoport
Attention!!! Deleting the key will result in data loss.

2) Portal Management >Management Repositories > select edit a specific repository > check the checkbox > Encrypt EAP and Connection String credentials.
3) After saving the settings, a restart of EA Infoport is required.