Connecting EaInfoport
Connecting EaInfoport to Azure EntraID
- First, you need to register the EaInfoport application in Azure. This is done in the "App registration" service.

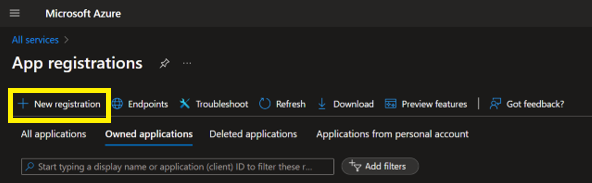
- by clicking "New registration"
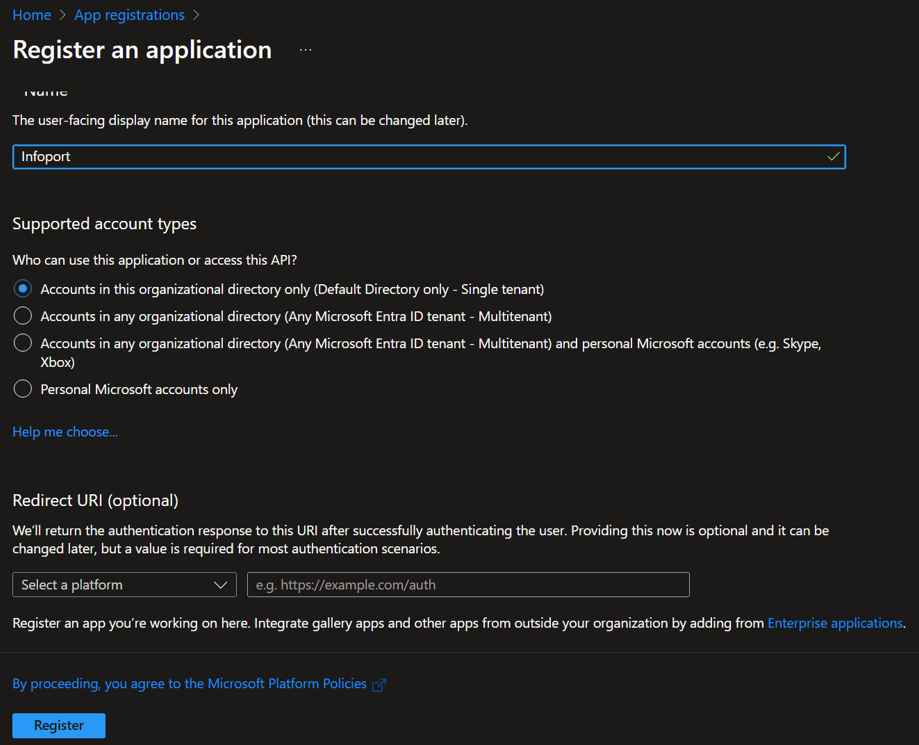
- In the registration process, you only need to fill in the "Name" (for example "Infoport") and complete the registration with the "Register" button.
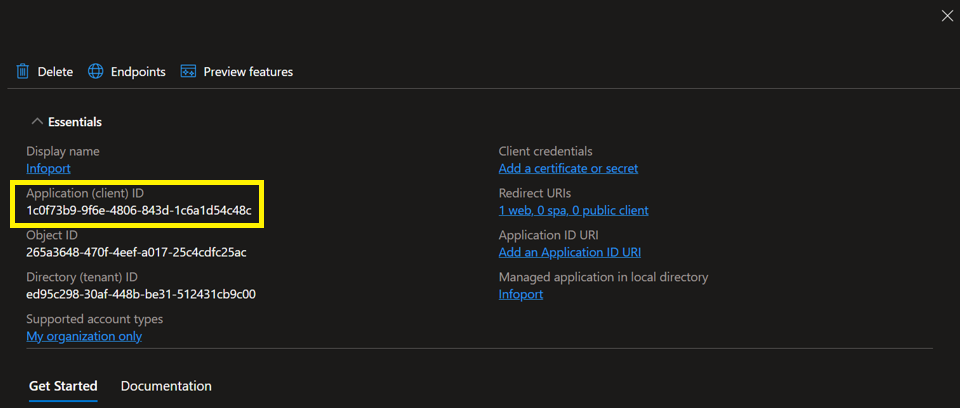
- Basic information about the registered application is displayed as a confirmation.
- The most important information here is the "Application (client) ID". We will enter this information in the Infoport configuration manager under "Client ID" (see later).
- If we now go back to the list of registered applications we will see "Infoport" among them (sometimes we need to use the "Refresh" button).
You can also see the "Application (client) ID" as the primary identifier of the application, which unlike Name cannot be changed after registration.
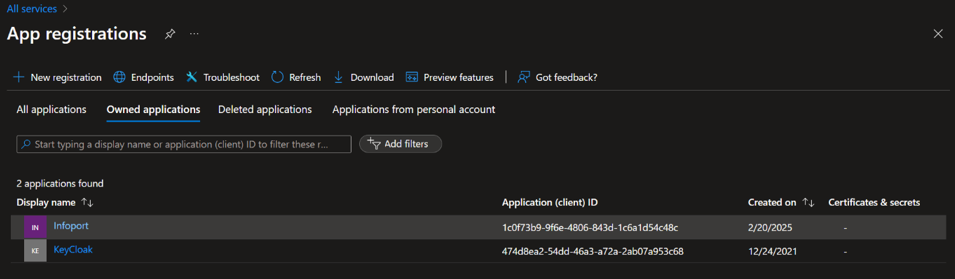
- Now we will continue configuring the registered Infoport application by clicking through (via the Infoport name) to the detail.
- Here in the menu we select "Manage" and then "Authentication".
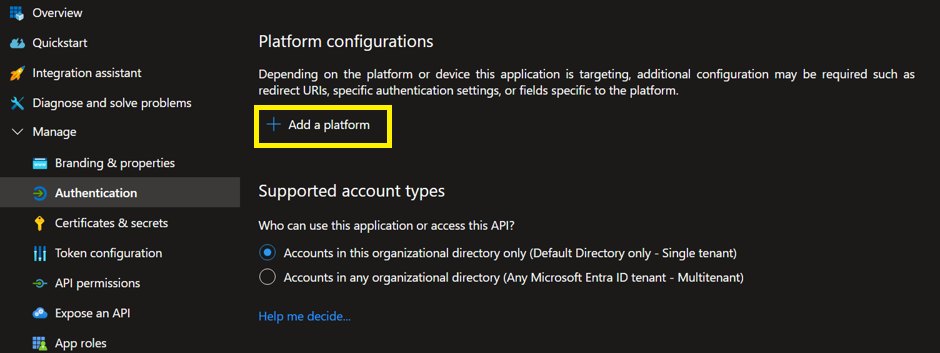
- The first thing to do is to add the Infoport application platform using the "Add aplatform" button by selecting "Web" from the menu.
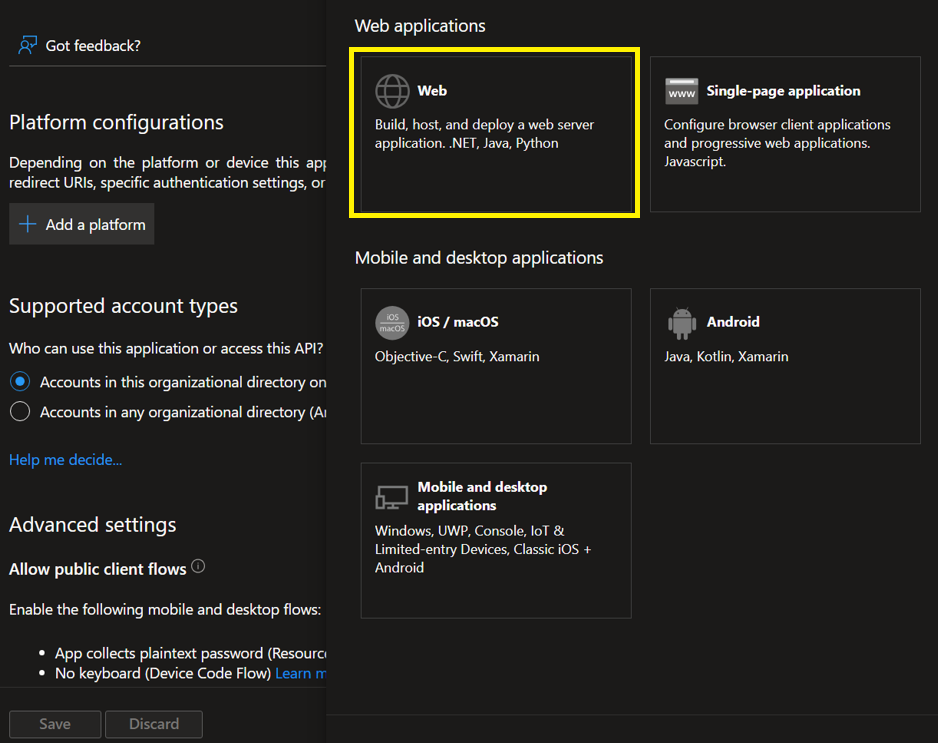
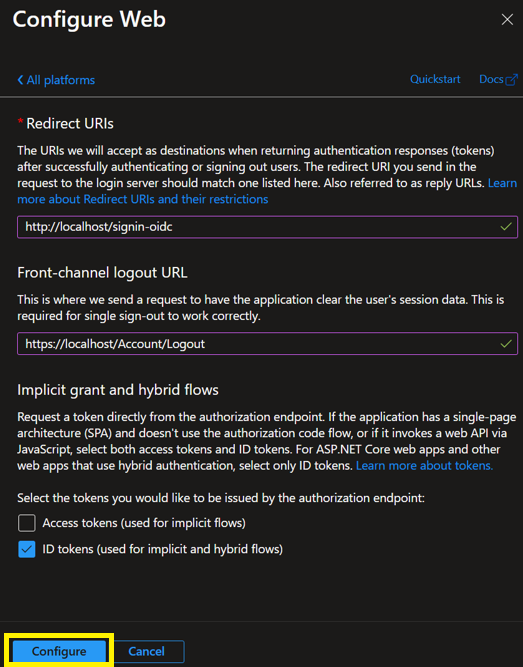
- Azure then asks you to fill in information about two URLs.
- The first of these "Redirect URIs" is the url of the Infoport application where the user will be redirected after logging in with the EntraID.
- Fill in the URI consisting of the server address (where we have Infoport running - in the example it is "http://localhost") and the fixed path "/signin-oidc".
- The second is the "Front-channel logout URL" and is the url of the Infoport application that will be called after the user logs out using single sign-out.
- Fill in the url here consisting of the server address (note: https must be used here) and the fixed path "/Account/Logout".
- It is very important to check the option "ID tokens (used for implicit and hybrid flows)", which selects what type of token will be sent to Infoport after successful authentication in EntraID.
- Confirm the configuration with the "Configure" button.
- The following is the "Certificates & secrets" setting.
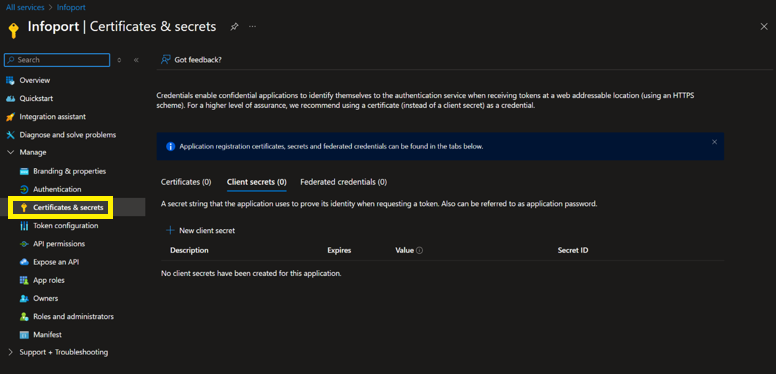
- Use the "New client secrets" button to add a new "client secret" with the desired expiration date.
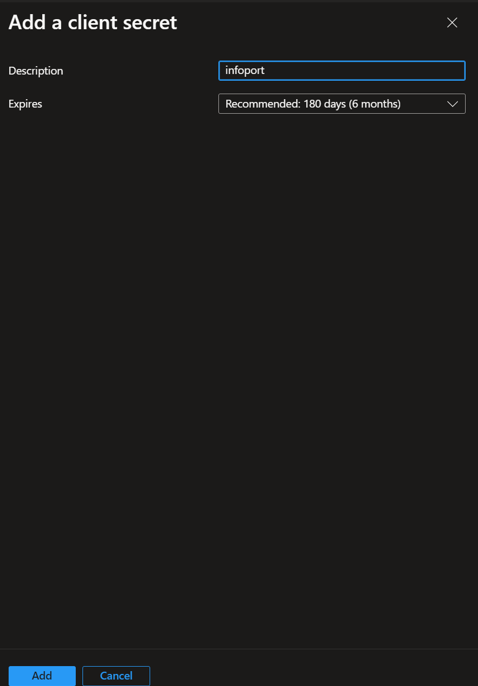
Note: the value is available for copying (in the Value column) only immediately after the Client Secret is created. If it is not copied immediately, a new Client secret must be created. This will be entered in the Infoport configuration manager under "Client Secret" (see later).
Endpoints
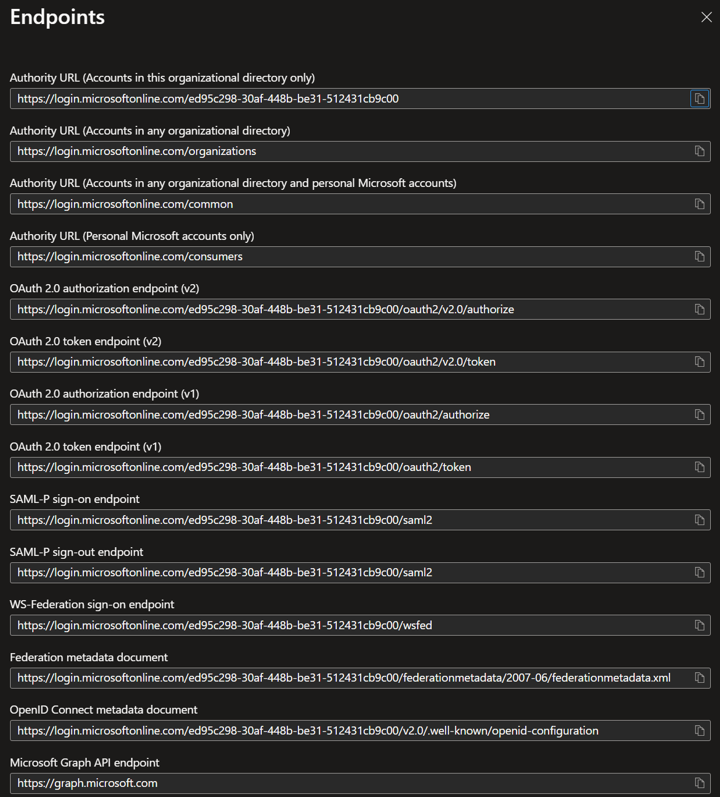
On the Endpoints tab, there are two URLs ready to copy, which we will need in the Infoport configuration manager.
The first of them is „Authority URL (Accounts in this organizational directory only)“ and looks like this, for example: https://login.microsoftonline.com/ed95c298-30af-448b-be31-512431cb9c00.
The server URL is usually the same, after the slash is the „Directory (tenant) ID“ of the registered application. We will fill in this value in the Infoport configuration manager under the „Server Realm“ field.
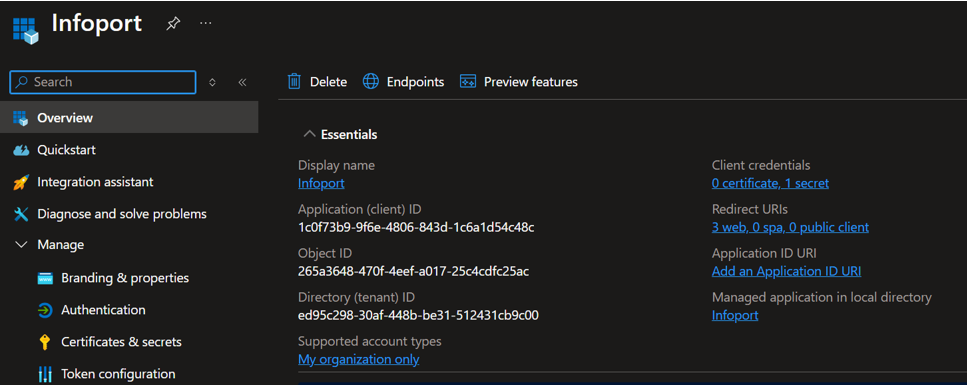
The second one is the „OpenID Connect metadata document“, it looks like this for example: „https://login.microsoftonline.com/ed95c298-30af-448b-be31-512431cb9c00/v2.0/.well-known/openid-configuration“ with the path again starting with the „Directory (tenant) ID“ value and the suffix usually being „/v2.0/.well-known/openid-configuration“.
This information will be entered in Infoport under the „Metadata“ field.